
Homemade almond milk is easier to make than you might think with simple ingredients! All you need are some almonds, filtered water, a pinch of salt, little bit of sweetener and a blender. A nut milk bag will makes this process even easier, but I do include other options if you don’t have one already.
Homemade Almond Milk at A Glance
- Soak your almonds first:
- The key to easy blending and creating a creamy texture lies in whether or not you’ve soaked the nuts long enough. Soaking the nuts allows the nuts to hydrate from the inside out for smooth and easy blending.
- 1 cup almonds to 4 cups of water (flexible):
- This is the average ratio of nuts to water to make almond milk, but you can play around with the ratio to suit you personal tastes. For an extra creamy almond milk, start with less water. For a thinner consistency add a bit more. Remember, it’s always better to start with less and add more as needed.
- Filtered water is recommended, but you can use tap:
- For best results use filtered/bottled water. It’s will produce a smooth, clean tasting almond milk and free from any unwanted contaminates. This is especially true if you live somewhere where the tap water tastes a bit funny.
How to Make Homemade Almond Milk
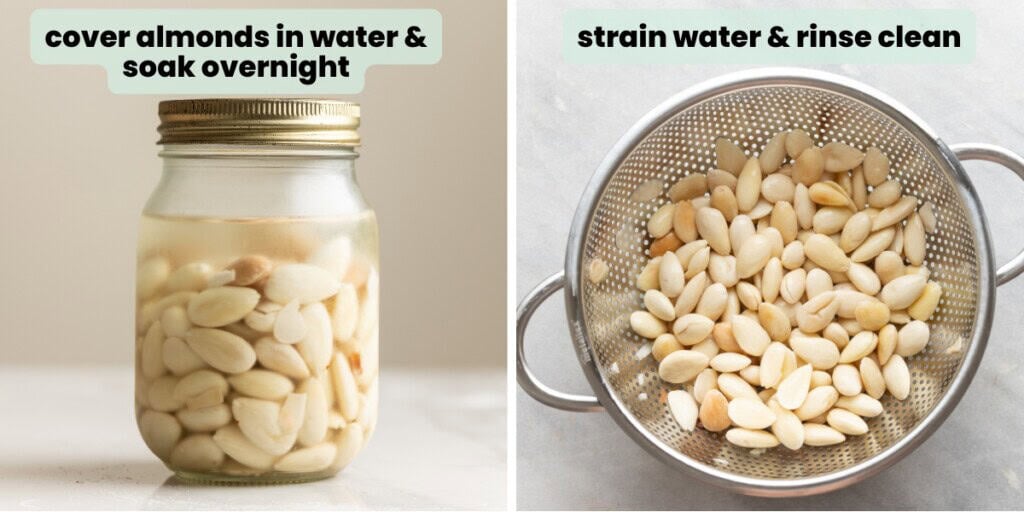
1. Soak almonds: place almonds in a bowl of jar and cover with water. Cover the jar or bowl then place in the fridge and leave to soak at least 8 hours and up 24 hours.
↳FYI – soak Time
If you’re working with a high-powdered blender like Blendtec or Vitamix, you can reduce the soak time to 4 hours, but 8 hours is a better option for most. I like to start soaking my almonds in the evening and blend sometime next day.
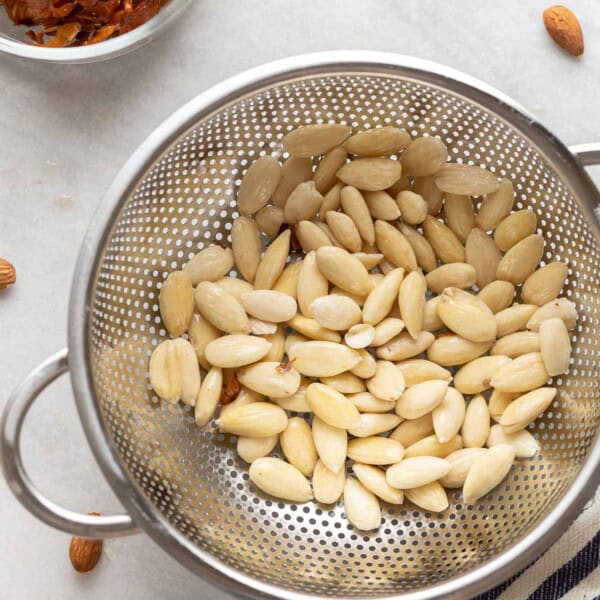
2. Strain & rinse: Pour the almonds through a colander to strain away the soaking water then rinse clean with cool water.
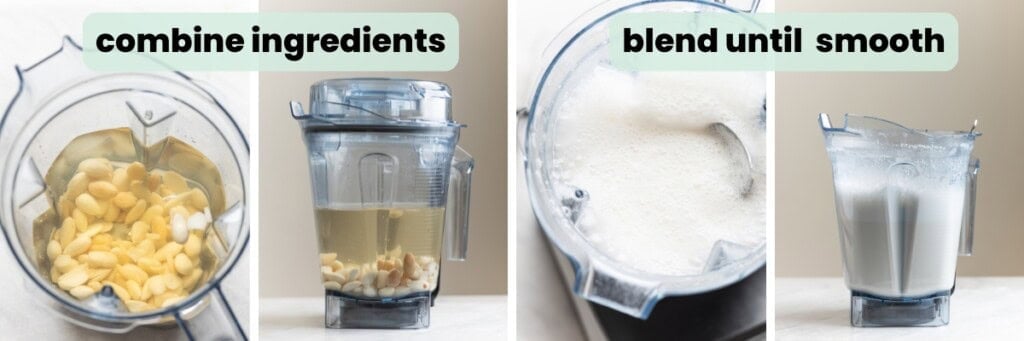
3. Add to blender: Add the rinsed almonds, fresh water, pinch of salt and your preferred sweetener to a blender.
4. Blend: Blend on high 1-2 minutes until you have a smooth, milky mixture. with no obvious grainy pieces.
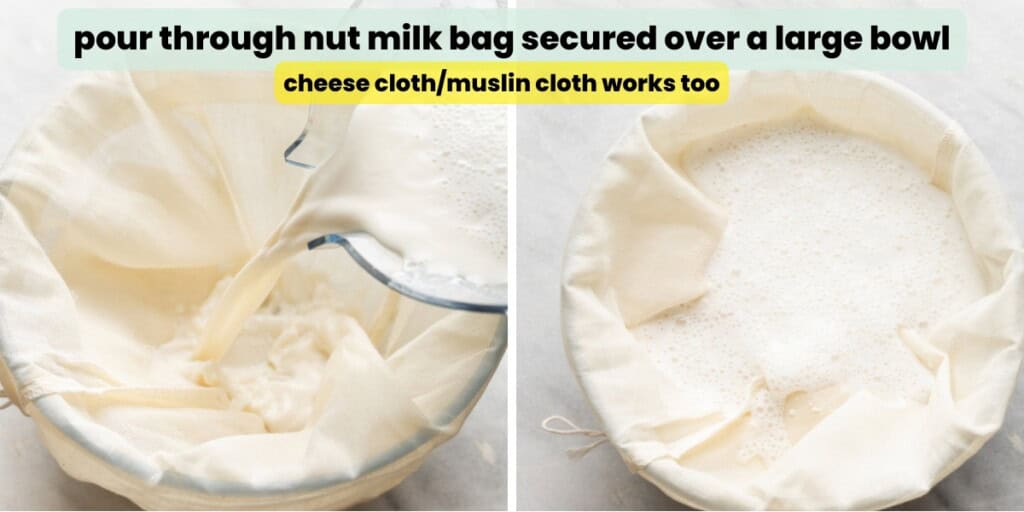
5. Pour through nut milk bag: Secure a nut bag over a large bowl. Make sure the edges are pulled down and tightened over the sides so the bag stays put. Carefully pour the nut milk into the bowl/bag.
↳FYI: Nut Bag Alternatives
- Cheesecloth or muslin cloth: Depending on how loose the knit is, you may need to double up.
- Clean tea towel: Choose a thin towel. The thicker the towel the more oomph you’ll need to put into squeezing out the milk. Try to use a towel without too many dyes.
- Paper coffee filter: This might be the slowest option for straining as the almond pulp will likely clog up the filter. You may need to periodically dump out the almond pulp and rinse the filter clean to get the job done.
- French Press: This won’t get everything, but you will remove a large amount of pulp.
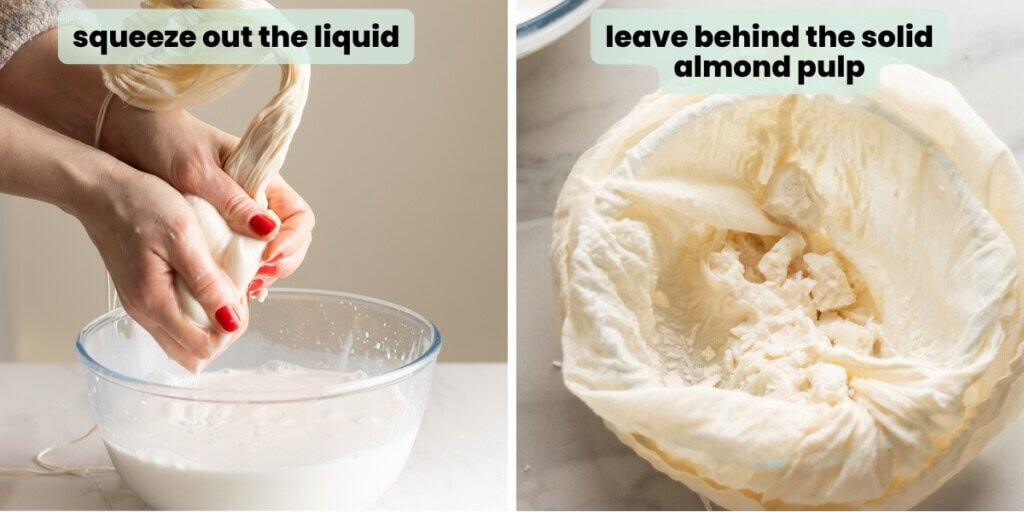
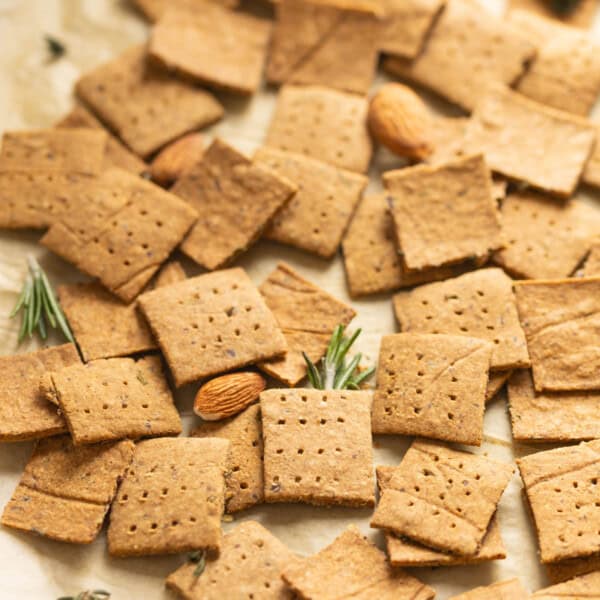
6. Squeeze out milk: Gather up the edges of the bag and squeeze as much liquid out of the bag and into the bowl as possible. In the end you should have a bowl full of milk and a bag full out of crumbly almond pulp. Discard the almond pulp or save it and make almond pulp crackers next.
↳FYI: It can be cheaper to DIY if you buy almonds in bulk:
It’s tricky to nail down the exact math here because the price of almonds/almonds milk will differ depending on where you live and also it seems to change day-by-day.
However, from the comparisons I was able to make make I did find it about £0.10-£1.00 cheaper to make my own almond milk if I buy in bulk (at least 1 lb, ideally more).
Buy from warehouse stores like Costco or Sam’s Club. Try specialty online retailers that sell whole foods/health foods in bulk. Check out International grocery stores/aisles for their bulk buy options. Just remember to check for gluten cross contamination when buying almonds in bulk!
FYI: Freeze your nuts for long term storage!

Tips & Variations
- Skin-on vs Skin-off: Almond milk from skinless almonds is smooth, creamy, a bit sweet & mild in flavor. Skin-on almonds milk has a nuttier, earthier, slightly more bitter flavor thanks to the tannins & phytic acid found in the skin.
- Roasted vs Unroasted: Roasted almond milk will be a bit darker in color and has a strong, nutty flavor. Unroasted almonds are more naturally sweet and the flavor fairly mild.
- Sweeteners: You can use any type of sweetener you like, really. To keep it paleo friendly/naturally sweetened use maple syrup or honey. You can even add 1-2 pitted medjool dates to sweeten. If you use granulated sweeteners, make sure to blend until it’s fully dissolved.
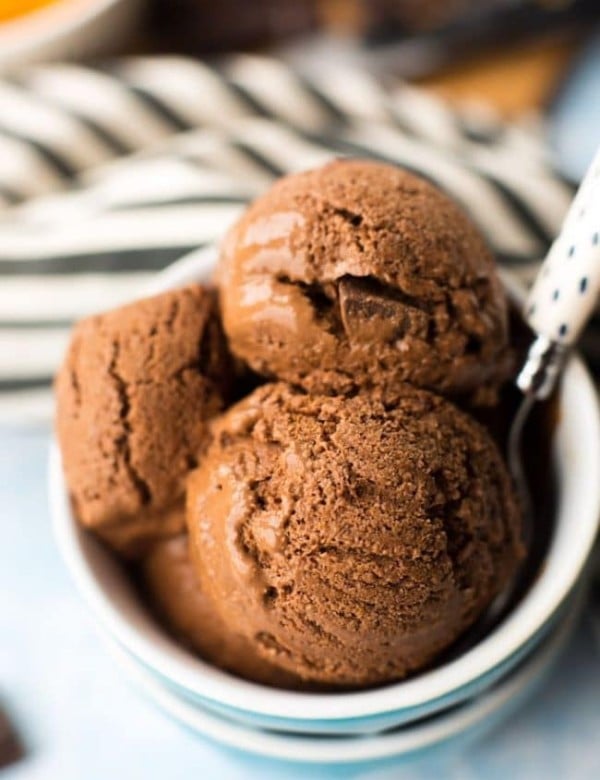
- Chocolate Almond Milk: Add 2-3 tbsp unsweetened cocoa powder/cacao to the blender. After blending, taste and add a bit more sweetener if you think it needs it.
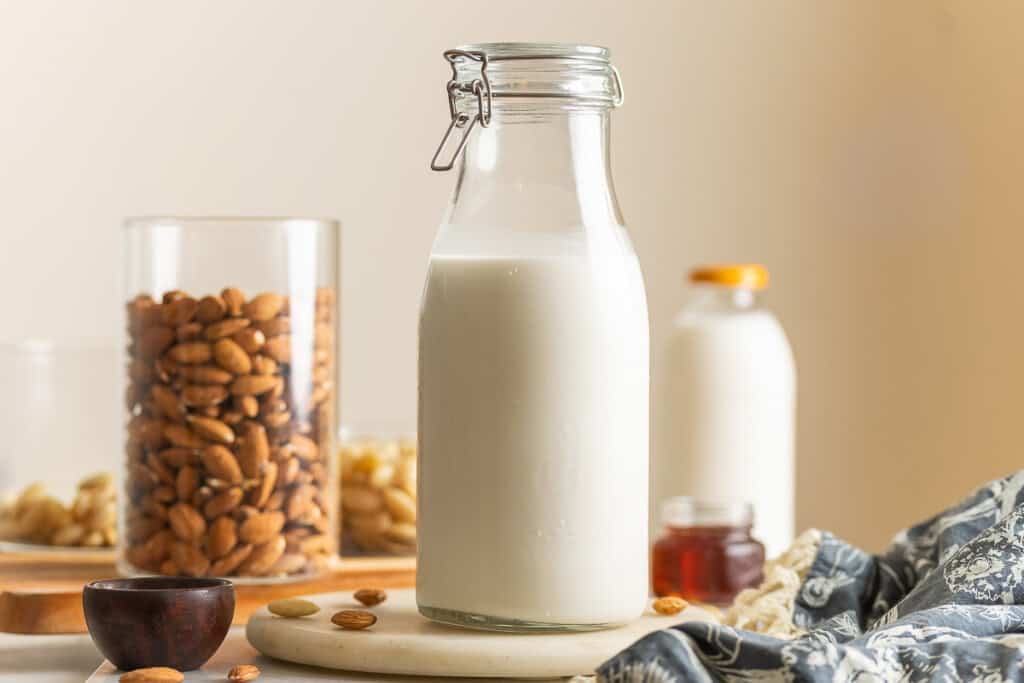
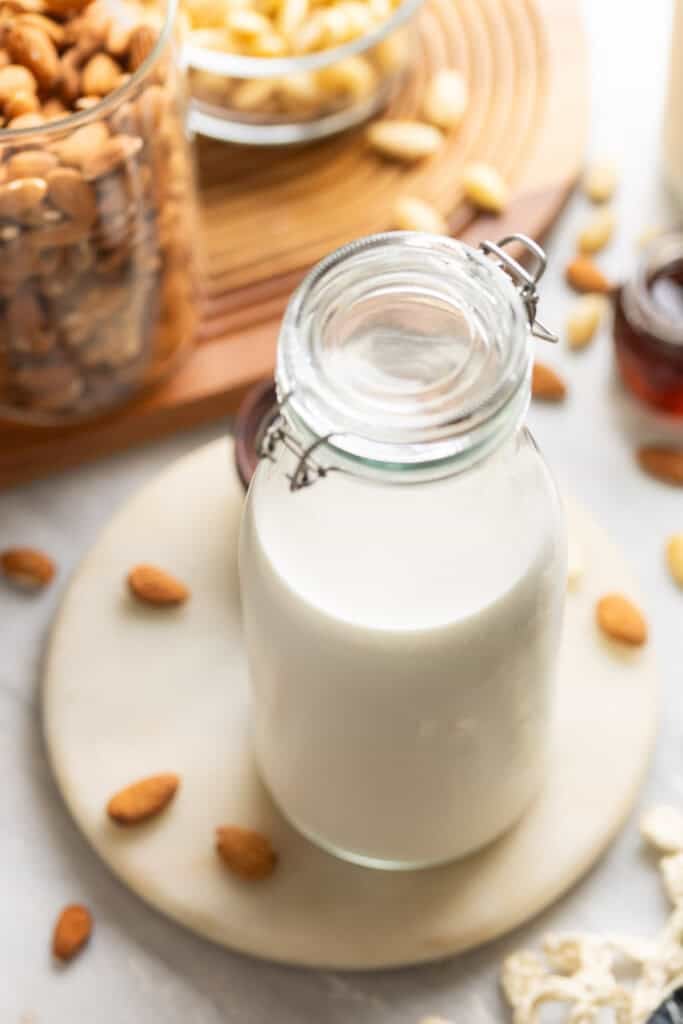
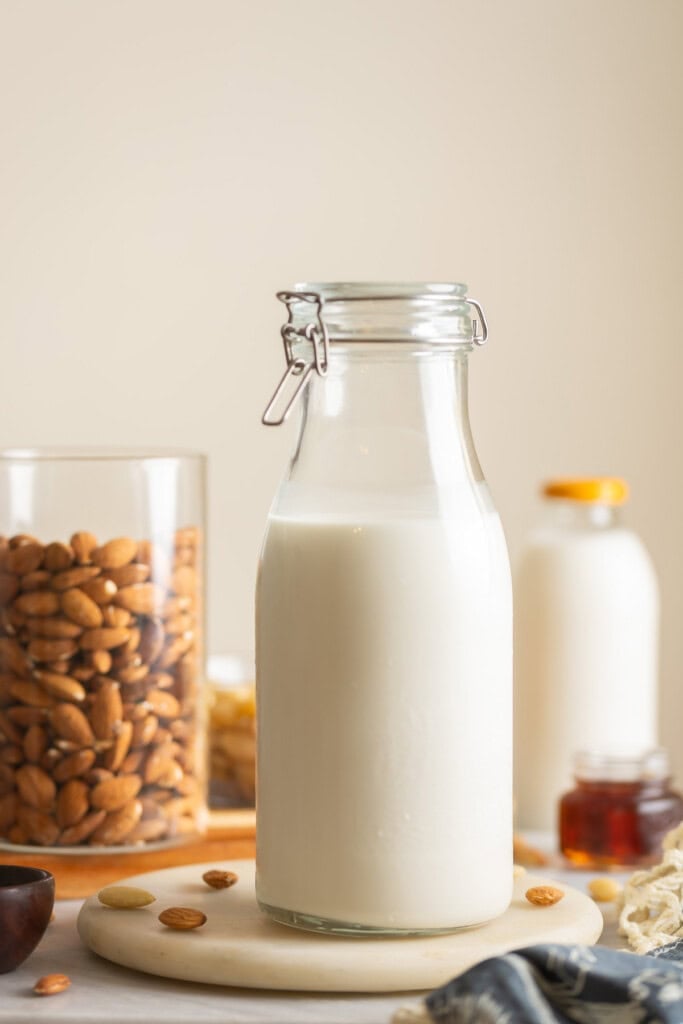
- Storage: Store your milk in an airtight container or jar and keep refrigerated. Use within 4 days, 5 days the longest. Make sure to stir or shake your milk before each use as it will naturally separate over time.
- Freeze: If you can’t drink it fast enough, you can freeze you leftover milk. The texture might go a bit gritty after defrosting, but you can blend it back into a smooth and creamy state if needed.
What to Make with Homemade Almond Milk
Enjoy!
Let me know if you try making your own Homemade Almond Milk! Leave a comment and review with your thoughts. I always appreciate the feedback and serving suggestions that you come up with!

How to Make Almond Milk
Make your own homemade almond milk with less than a handful of ingredients!
Ingredients
- 1 cup unsalted whole almonds, raw or dry roasted (140g)
- 4 cups filtered water
- ½ tsp vanilla extract
- pinch of sea salt
- 1 tbsp sweetener - see notes for options
Instructions
- Add the almonds to large bowl or jar and cover with water. Cover the bowl or seal the jar then place in the refrigerator and let soak overnight (4-24 hours)
- Drain & rinse the almonds and discard the water.
- Add the rinsed almonds to a high powdered blender along with the fresh, filtered water, salt, vanilla and sweetener. Blend on high 1-2 minutes or until the your mixture is creamy and smooth.
- Place a nut milk bag or clean kitchen towel over a large bowl or container. Leave the edges hanging over the sides - secure the edges down with a large rubber band or tie with a string so they don't fall into the bowl when you add the milk.
- Pour the nut milk into the cloth/bag then gather up the edges of the bag and squeeze out as much liquid from the nut mixture into the bowl as you can until you have nothing but leftover almond pulp.
- Transfer the nut milk to a large, sealable container or jar and refrigerate. Use with within about 4-5 days. Shake well before each use - homemade milk naturally separates without the added stabilisers found in store-bought versions.
Notes
- Almond Type: You can use dry roasted, raw almonds, skin-on of skinless almonds - just make sure they are unsalted/unseasoned.
- Sweeteners: Use 1-2 tbsp pure maple syrup, honey or agave. You can also try adding 1-2 pitted medjool dates - add before blending. You can add a granulated sugar, but make sure to blend until the sugar crystals dissolve.
- Make Unsweetened Almond Milk: Don't add sweetener or vanilla extract.


Leave a Review!