

Learn how to make your own gluten free oreo crust using gluten free chocolate sandwich cookies. This cookie crust tastes and looks just like the regular gluten-filled ones!
Gluten Free Oreo Crust at A Glance
- 2 Ingredients
- All you need are some gluten-free oreos or other similar gluten free chocolate sandwich cookies and melted butter.
- Not all cookies weigh the same
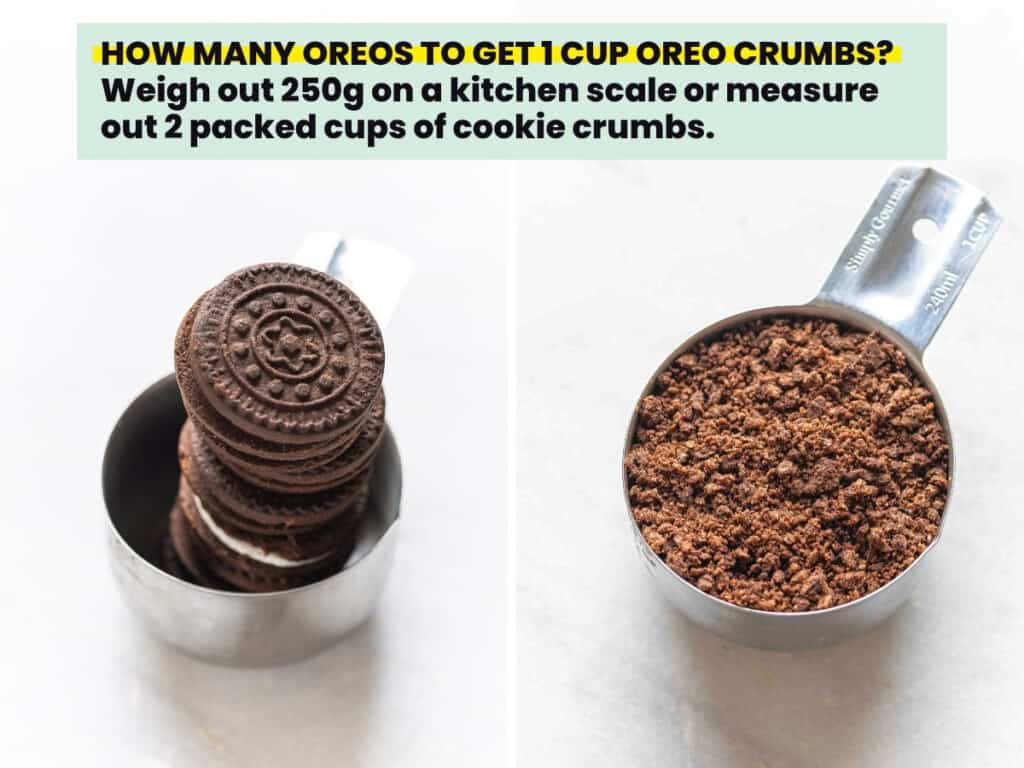
- Ultimately you need about 250g of cookie crumbs which comes out to about 2 full packed cups. This came out to 14 gluten free oreo cookies for me, but it will vary depending on brand. If you don’t have a kitchen scale, I recommend you blend the cookies first then measure them into measuring cups to make sure you have to right amount.
- Not really any different than one made with regular oreos
- Taste, texture and looks – this crust is undetectably gluten free which makes it a great chocolatey crust to use in cheesecakes, French silk pie, etc.
How to Make Your Own Gluten Free Oreo Crust
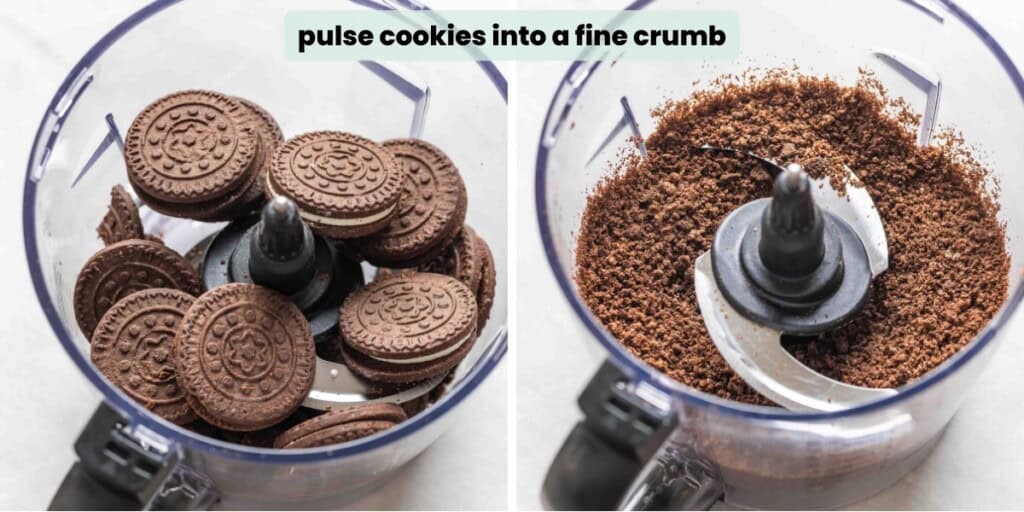
1. Make cookie crumbs. Add whole cookies (filling included) to a food processor or blender. Pulse in short burst into fine crumbs.
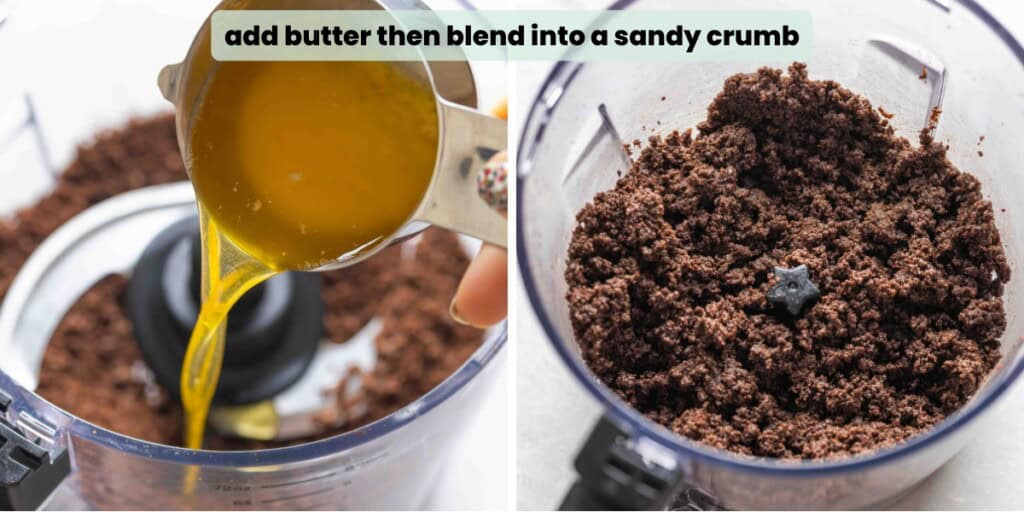
2. Add butter. Pour melted butter into your blender/processor and mix once more until fully combined. You should end up with a mixture that looks like loose, wet-sand, but clump together easily if you grab a fistful of it.
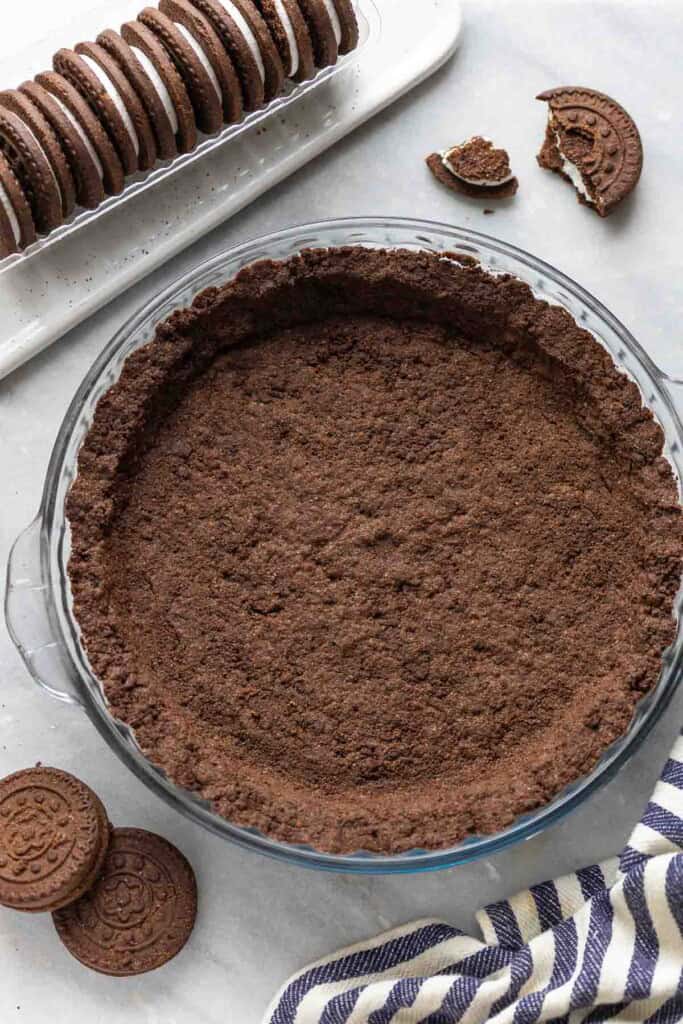
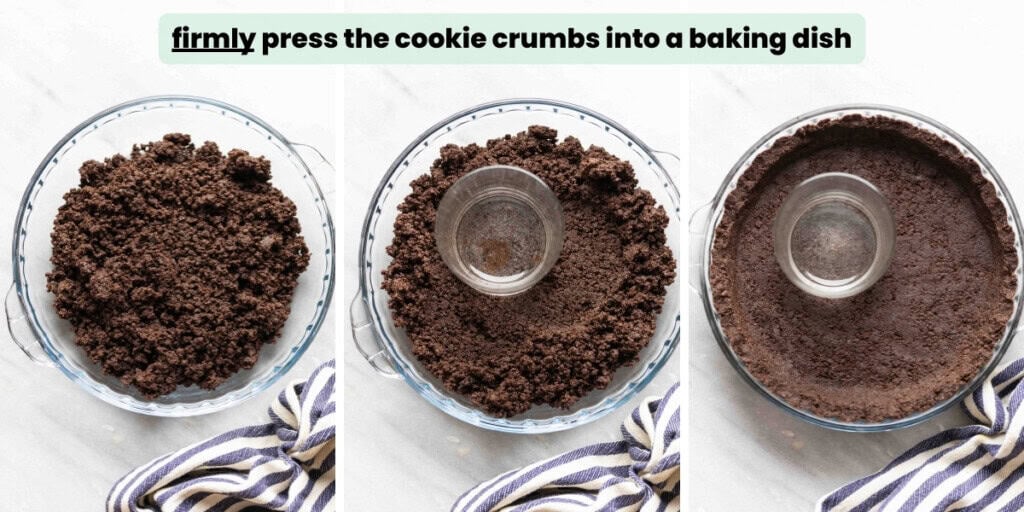
3. Press into baking dish. Tip the mixture into your an un-greased pie plate or baking dish. This recipe makes enough for an 8-inch, 9-inch or 10-inch pie dish or baking pan.
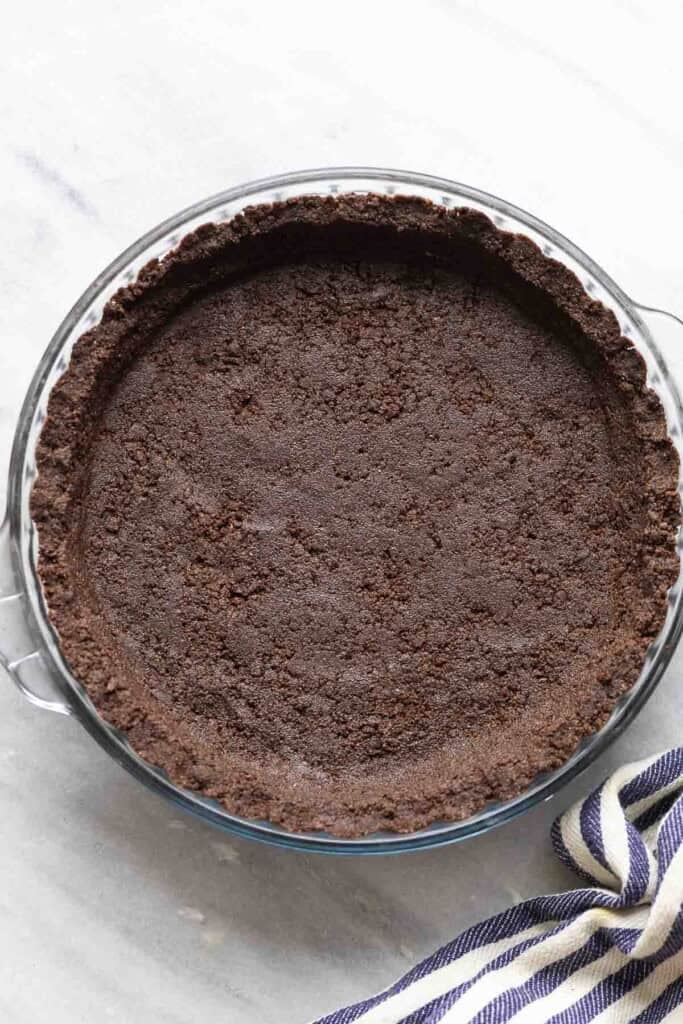
Firmly press the crumbs into the bottom & sides in an even layer. The tighter your press the cookie crumbs into the pie dish before baking, the more sturdy your crust will be. Loosely packed crumbs will make a crumbly crust.
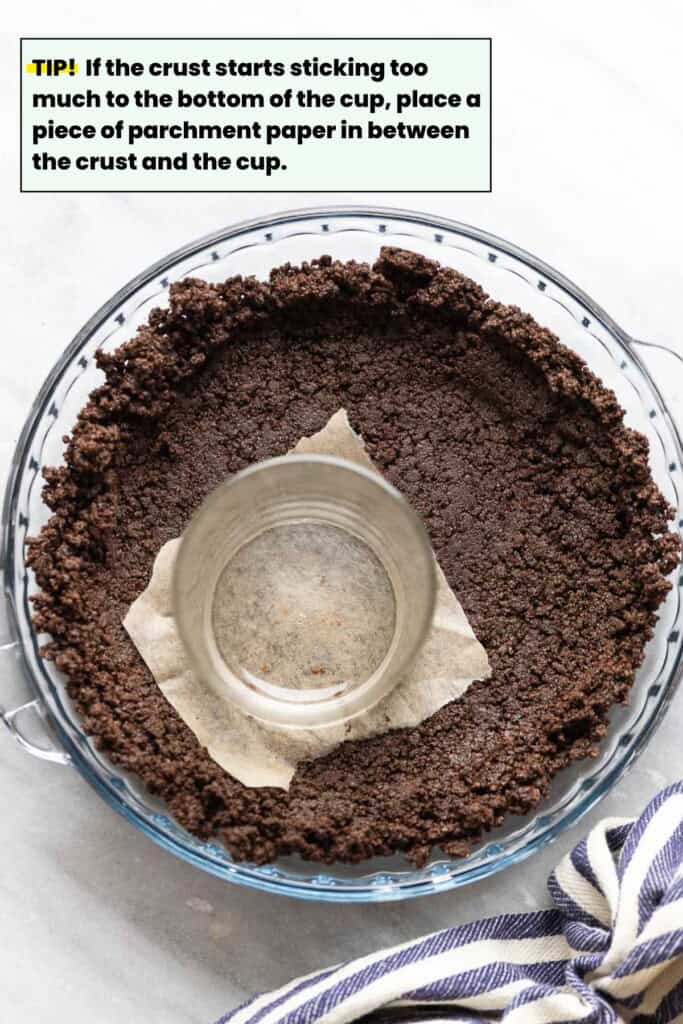
Quick Tip!
Use a flat-bottomed cup or the bottom of a measuring cup to press/smooth the crust into the plate. If the crust sticks too easily to the cup, place a piece of parchment paper between the crumbs & cup to keep things moving smoothly.
4. Bake crust. Bake pie crust in a preheat oven for about 10 minutes then set the pie pan aside and let cool fully before adding a filling.

Recipe Tips & Ideas
- Prep Ahead: After baking, cool fully then cover and keep in the fridge until needed up to 5 days in advance.
- Freeze for Later: Cool fully then wrap up well and freeze in the baking pan for up to 3 months. Thaw in the fridge a few hours then add your filling.
- Leave it Unbaked: Press into a loose-bottomed springform pan so you can easily slice and serve without too much breaking. Make sure to chill at least 20 minutes to firm up.
- Pan Type:
- Glass and ceramic baking dishes are better for pies where you want some of the the filling to be surround by the crust.
- Non-stick pans are great for cheesecake bottoms or pies where you’re okay with the filling or cream layer sitting on top of the crust.
scs
🌟Make this Next🌟
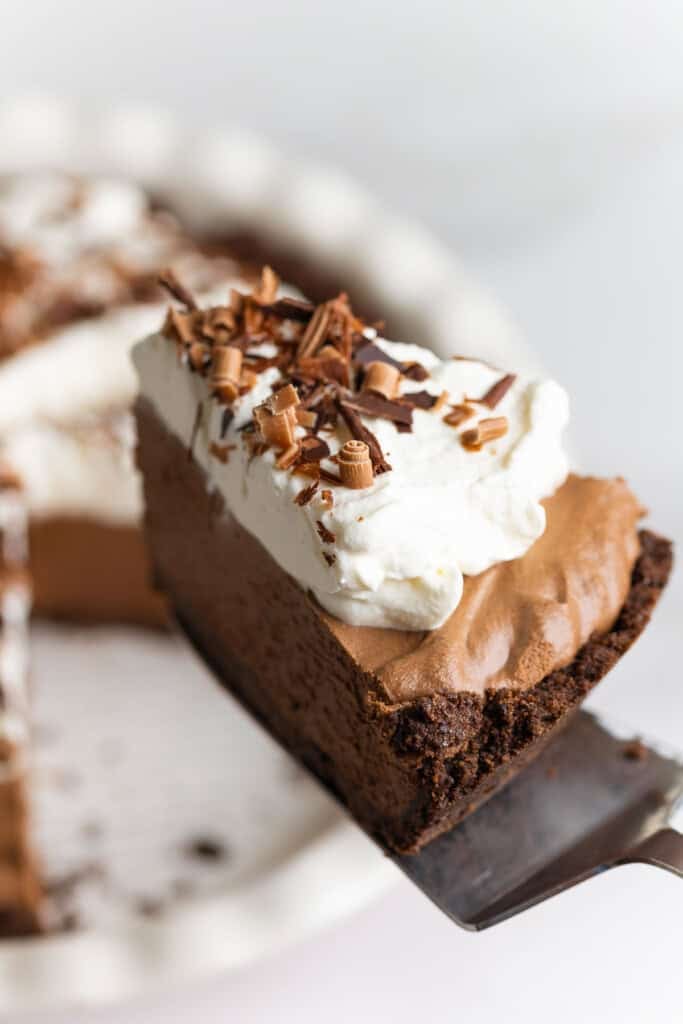
Impress the gluten free skeptics in your like by making gluten free French Silk Pie with this chocolate cookie crust! It has a rich & silky chocolate mousse-like filling and an easy to make chocolate cookie crust.
More gluten Free Pies & Pie Crust Recipes
Enjoy!
Let me know if you try this Gluten-Free Oreo Pie Crust recipe! Leave a comment and review with your thoughts. I always appreciate the feedback and serving suggestions that you come up with!

Gluten Free Oreo Crust Recipe
Made with only 2 ingredients & taste just like the regular gluten-filled ones!
Ingredients
- 2 cups oreo cookie crumbs (250g) - 14 cookies, but amounts will vary based on brand - see notes
- 4 tbsp butter, melted (56g)
Instructions
- Preheat oven to 350°F (180°C).
- Add whole cookies (don't remove the filling) to a food processor or blender. Pulse the cookies until you grind them up into a fine crumb.
- Add the melted butter to the blend and pulse again in 5-second bursts until evenly combined and the cookies crumbs are moist. The mixture should look sandy and loose, but you should be able to clump it together.
- Add the cookie crumbs into an un-greased 8-inch, 9-inch or 10-inch pie dish or baking pan. Firmly press the cookies crumb into the bottom and sides of the pan. Use a spoon or the bottom of a flat cup to make it even.
- Bake the crust for 10 minutes then set aside to fully cool then add your filling end proceed with your pie recipe as normal.
Notes
- How many oreos? The easiest way to figure this out is by using a kitchen scale to weight out 250g of cookies. Not all oreos are the same - you may need more or less depending on the brand you use. If you don't have a kitchen scale, grind the cookies up first, then tightly pack the crumbs in a measuring cup until you have 2 full cups of cookie crumbs.
- Freeze for Later: Wrap up well and freeze in the baking pan for up to 3 months. Thaw fully before adding your filling.
- Short Term Prep: Keep in the fridge up to 3 days.
- Pan size: Choose an 8, 9 or 10 inch round or square pie dish or cake pan.
- Tip for no bake pies: You can leave the crust unbaked if desired. I recommend you use a spring-form cake or tart pan to make it easier to serve without breaking.

Leave a Review!