
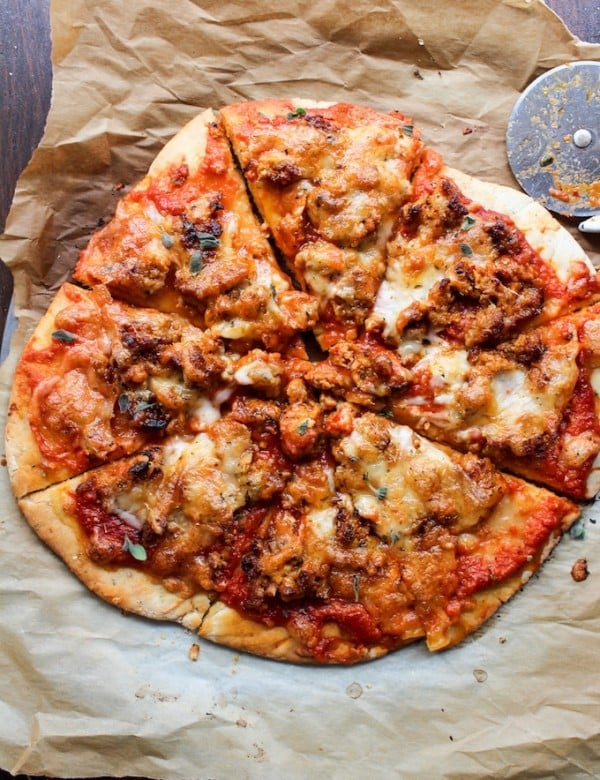
This easy gluten free pizza dough is simple to mix, shape, and bake into a delicious, satisfying crust that’s both sturdy and foldable. The finished pizza has a soft, puffy crust and a tender, chewy interior. It’s so good, even your gluten-eating friends will be reaching for another slice!

🍕Why Make This Gluten Free Pizza Dough🍕
- Easy to Make: No special equipment or complicated steps needed. Mix by hand or use a stand mixer – your choice! You don’t even need a rolling pin to press and stretch the dough into shape.
- Flexible Dough: This dough behaves more like traditional dough, but without the gluten. Instead of xanthan gum, this recipe relies on psyllium husk to create a soft and springy dough that’s easy to shape without tearing or crumbling.
- Soft, but sturdy pizza base: It bakes up with a soft, tender inside and outer crisp. It’s sturdy enough to slice, pick up, and even fold. No soggy centers or brittle edges here.
BTW: You can also complete your perfect pizza night by making a full pizza with half the dough and Pizza Hut style cheesy breadsticks with the other!
Ingredients You’ll Need
Wet Ingredients
- whole psyllium husk
- water
- apple cider vinegar
- olive oil
Dry Ingredients
- gluten free flour blend
- yeast
- sugar
- salt

Bite-Sized Gluten Free Pizza Dough Steps
- Make a psyllium gel
- Whisk dry ingredients
- Add wet ingredients
- Knead & shape dough
- Rest & rise
- Bake
Make the Psyllium Gel First
Whisk together water and whole psyllium husk in large jug or bowl until no lumps remain. Set aside to thicken while you mix the dry ingredients. Just before adding it to the flour mixture, stir in the vinegar and oil.
↳Use Whole Psyllium Husk:
Make sure to use whole psyllium husk and not psyllium husk powder. Powdered psyllium husk clumps quickly & easily when introduced to water and weighs more when measured by volume (meaning you need to adjust the amount).
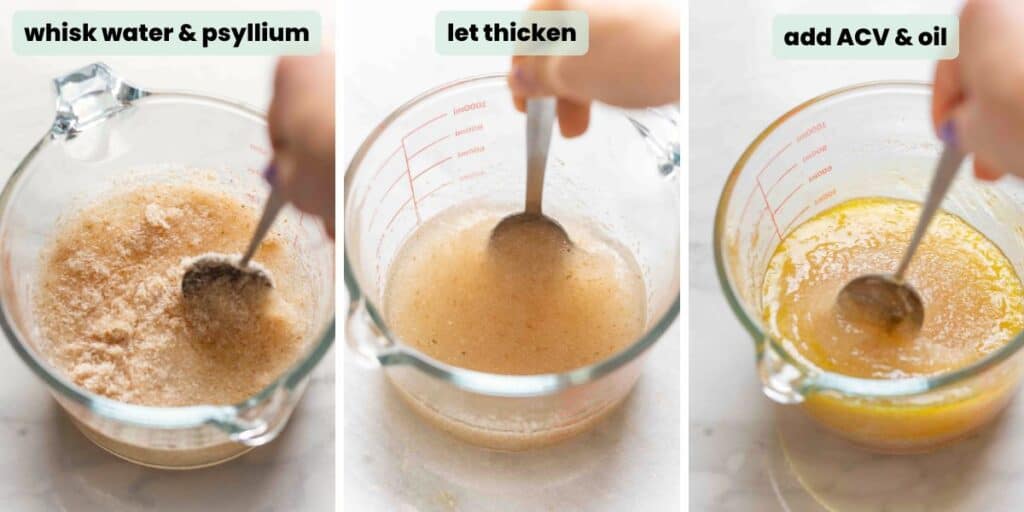
Add Wet Ingredients to Dry Ingredients
- Whisk the flour, salt, yeast and sugar together until fully combined.
- Pour the psyllium gel mixture + ACV and oil into the dry ingredients.
- Mix together into a thick, soft, slightly sticky dough.
- Make sure to scrape down the bottom & sides of the bowl.
- Mix by hand, with a stiff spatula/wooden spoon OR in a stand mixer with a dough hook.
↳ Use Instant Yeast (AKA: quick-rise or rapid-rise yeast)
Instant/quick yeast is a much faster/easier yeast option because you don’t need it to dissolve & foam up in warm water first. Just mix it directly into your dry ingredients and you’re good to go.

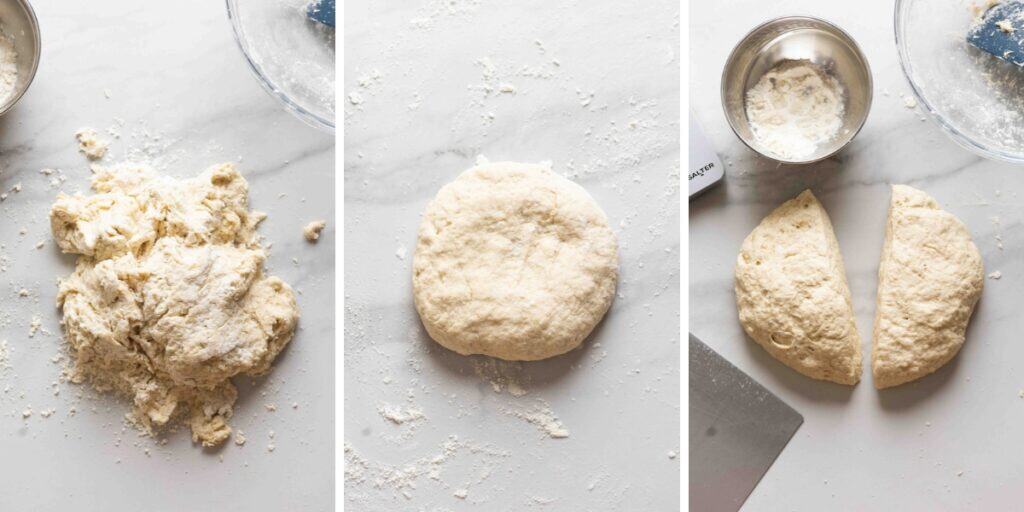
Knead & Divide
Turn the dough out onto a floured surface and knead until it’s thick, spongy & soft. It will start out a bit sticky, but soften up as incorporate more flour when kneading the dough.
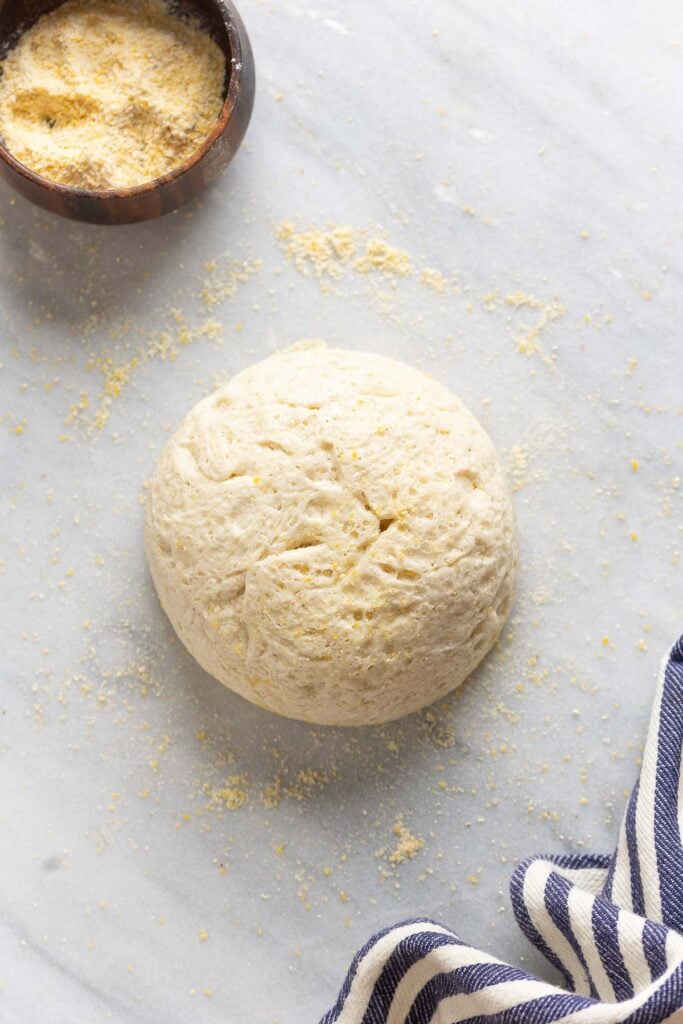
Shape dough into a ball then divide in two equal sized portions which can be stretched out into 10-12 inch pizza crusts.
↳ FYI: Why Knead Gluten Free Dough?
In typical gluten-based doughs, kneading helps develop gluten strands to create structure and elasticity. While there’s no gluten to build in this gluten free pizza dough, a bit of gentle kneading helps fully incorporate the ingredients to create a smooth, uniform texture.
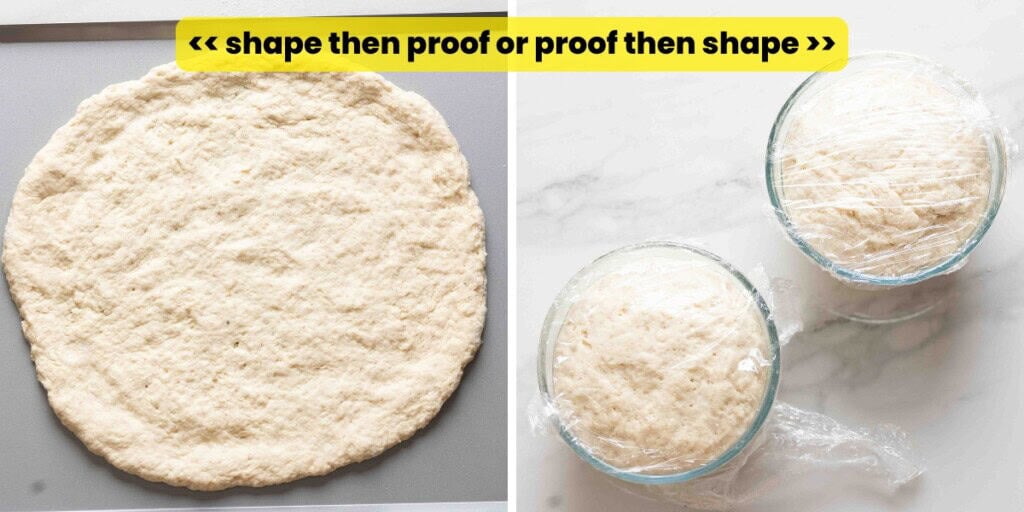
Shape & Proof (or Proof & Shape?)
Ok, you’ve got two options here.
First things first, consider: Do you want pizza ASAP/within the same day? Or are you preparing the dough a day or two ahead of when you need it?
- If you plan on baking your pizza after a quick rise/ same day: stretch and shape the dough first, brush with olive oil, then cover and let rise on a pizza tray or baking sheet.
- If you plan on baking your pizza in a day or two: transfer the dough balls to an oiled bowl or container then cover and set aside to rise and do its thing. Let rise at room temperature for a few hours, then transfer to the fridge overnight.
What difference does it make?
While gluten free bread dough does rise with yeast, it’s not to the same extent as it does with gluten-dough.
You don’t need to worry about punching the dough down before baking because gluten-free doughs don’t trap as much air as they proof. In fact, GF dough will benefit from less handling.
The idea is to shape the dough, let it rise, then add toppings without pushing out the air so you end up with a a slightly puffier crust after baking.
That being said, this is mostly just a visual difference. The main benefit is that you save yourself the extra flour cleanup later on by shaping the dough right away.
If you want to make the dough a day or two before you need it (good for developing extra flavor), store it in a bowl or container where you can keep it out of the way until you’re ready.
I really struggled to decide which option was better so I’m giving you the option to choose your preference.
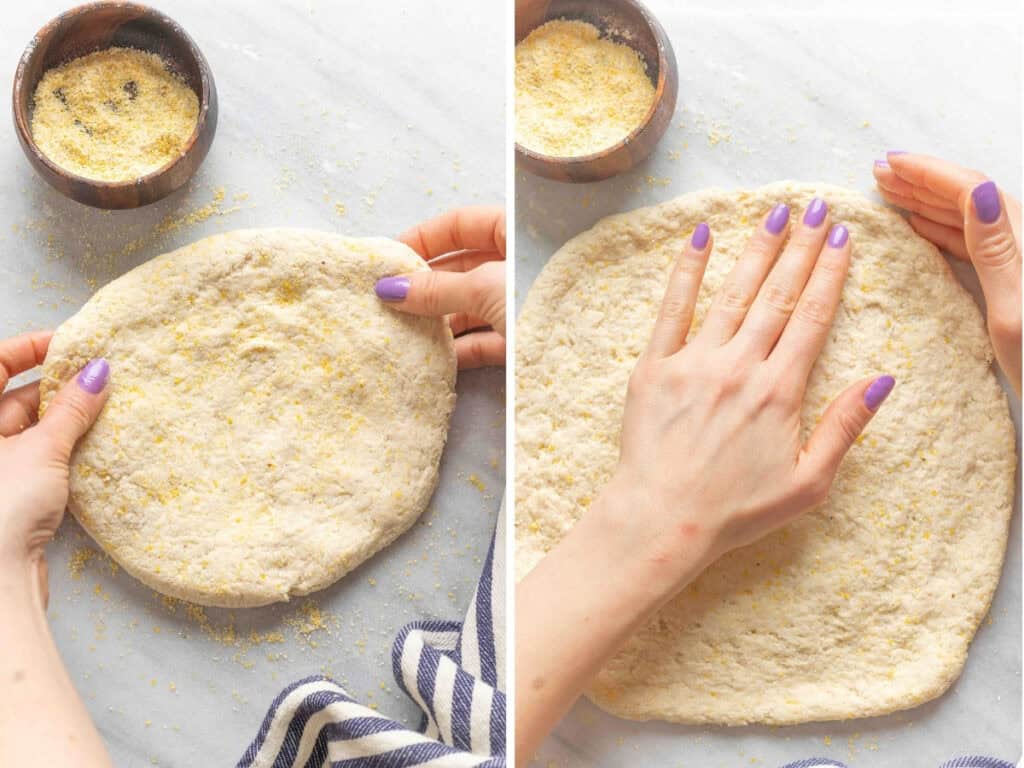
Press & Stretch Dough into Shape
Stretch the dough out on a floured surface with lightly floured hands.
Work slowly to press and stretch the dough until it’s the right size. Start from the center and press outwards to increase the size. Make sure to lift and turn the dough as you work every so often to keep it from sticking to the surface.
So long as you work gently, the dough shouldn’t tear or break. If it does, just pinch the pieces back together.
Gently lift and transfer to a large, un-rimmed baking sheet or pizza screen (recommended). Stretch & flatten the dough out after transferring if needed to get it back in shape.
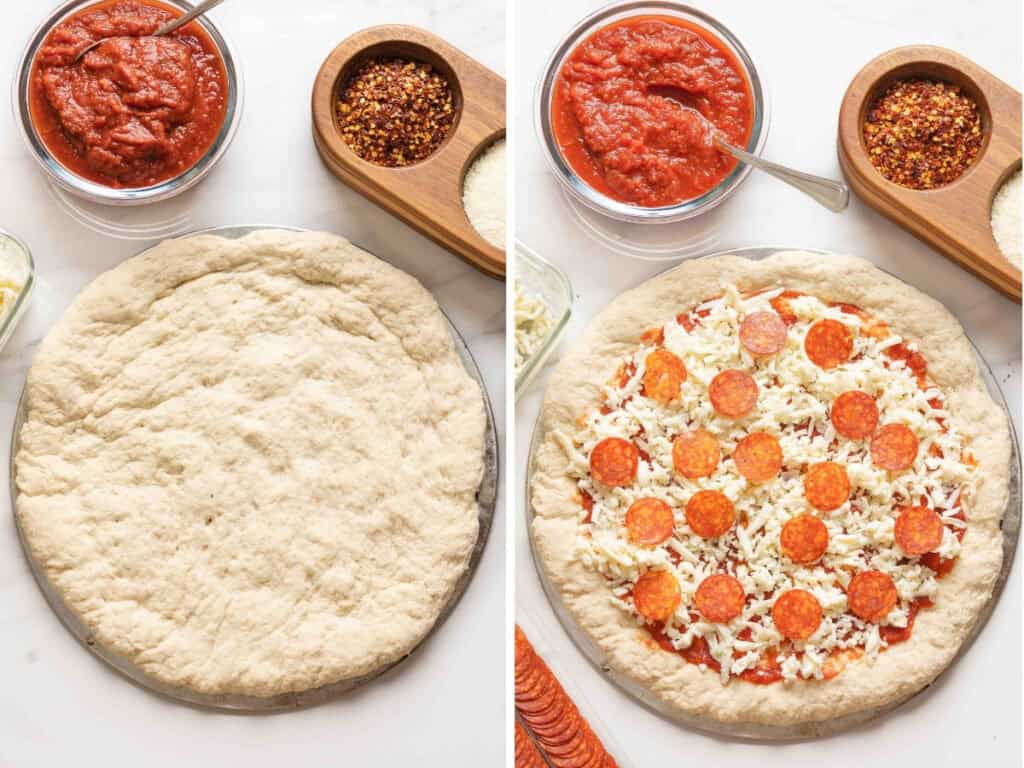
Add Pizza Toppings & Bake
Preheat the oven early enough that it has time to come up to temperature.
Brush the dough with olive oil before adding any toppings (unless you did already before proofing). The goal here is add a bit more flavor, moisture and color to the crust as it cooks.
Add your preferred toppings, pizza sauce, cheese, spices, veggies etc.
A Few Tips to Keep in Mind
- Preheat oven: Pizza ovens are HOT and you want your oven to be too. Let it fully heat up, about 15-20 minutes before you add your pizza for best results.
- Don’t bother with parchment paper: It will just burn and potentially catch fire in the oven.
- Don’t overload the pizza with toppings: Aim for about ¼ to ⅓ cup sauce and 1 1/2-2 cups cheese. Feel free to add your other favorite toppings, just don’t load up too much or the pizza base won’t cook in time with the toppings.
- Use a pizza screen: This will allow air flow on the bottom of the pizza for an even cook without needing a pizza stone. No need to heat the screen first.
- Bring dough up to room temp if it’s been in the fridge: Just leave it out on the counter for about an hour before shaping and stretching.


Serving Suggestions: Add a sweet drizzle of hot honey or balsamic reduction on top. Pair your homemade pizza with a salad to lighten things up. Try this simple Tomato Arugula Salad with Walnuts, crispy romain Lemon & Garlic BLT Salad or Strawberry Tomato Balsamic Salad.

More Gluten Free Bread Recipes
- Gluten Free Breadsticks (Olive Garden)
- Homemade Gluten Free Stromboli
- Gluten Free Sausage Bread
- Easy Gluten Free Bread Recipe (Dairy Free)
- Easy Gluten Free Focaccia Recipe
- Homemade Gluten Flour Flour Tortillas
- Gluten Free Cheese Scones
- Gluten Free Roti (Millet Flour)
- Gluten Free Manakish Za’atar
- Gluten Free Breadsticks with Zucchini (Vegan)
Enjoy!
Let me know if you try this Homemade Gluten Free Pizza Dough recipe! Leave a comment and review with your thoughts. I always appreciate the feedback and serving suggestions that you come up with!

Gluten Free Pizza Dough
This easy gluten-free pizza dough is simple to mix, shape, and bake into a delicious, satisfying crust that’s both sturdy and foldable.
Ingredients
- 1 ¾ cup lukewarm water (420ml)
- 4 tbsp whole psyllium husk (20g)
- 2 ½ cup + 1 tbsp gluten free all purpose flour blend (360g)
- 2 ¼ tsp quick yeast (8g)
- 2 tsp salt
- 1 tbsp sugar
- 2 tsp apple cider vinegar
- 1 tbsp olive oil + more for the crust
Instructions
- Psyllium Gel: Mix water and psyllium husk together in a medium bowl. Set aside to thicken up as you prep the other ingredients.
- Flour Mixture: Whisk flour, yeast, salt and sugar together in a large bowl until well combined.
- Combine ingredients: Stir the apple cider vinegar and oil into the psyllium gel then add the wet ingredients to the dry ingredients. Mix together until fully combined. Make sure to scrape down the bottom and sides of the bowl every so often to get all the floury bits. Mix together until you end up with a thick, smooth, slightly sticky dough that easily clumps together.
- Knead & Divide: Lightly flour your hands and a clean work surface. Place dough on the floured surface and knead until soft and smooth. Divide into two equal sized dough balls. Set one ball aside and cover with a tea towel to keep from drying out while you work with the other.
- Shape: Add a bit more flour to your work surface. Starting with the first dough ball: press down on the dough with your hands to flatten into a disc. Gently pull and gradually stretch the dough out in a circular shape. Make sure to lift and turn the dough every so often to keep it from sticking to the worktop. Continue pressing and stretching the dough (starting from the center and moving out) until your end up with a 10-12 inch circle. Once big enough, carefully lift and transfer to a large, un-rimmed baking sheet or pizza screen (recommended). Stretch & flatten the dough out after transferring if needed to get it back in shape.
- Proof: Brush a bit of olive oil over the top of the crust, then cover with plastic wrap or a kitchen towel in a warm, draft free environment to let the dough rise - at least 1 hour. (See notes for overnight proof)
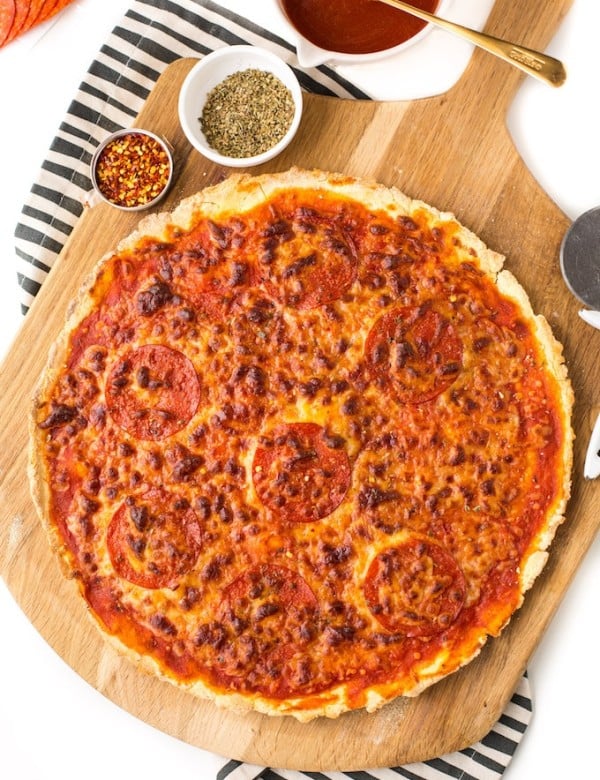
- Add Toppings & Bake: Preheat oven to 475°F (250°C) - heat for at least 15 minutes before adding pizzas to ensure it's fully heated. Add your preferred pizza toppings. Place in the middle of the oven and bake for 12-15 minutes until the crust is a lightly golden brown. Remove from oven, slice & serve.
Notes
Pizza Toppings
- Use about ¼ - ⅓ cup pizza sauce and 2 cups shredded mozzarella plus you favorite pizza toppings (pepperoni, mushrooms, olives, seasonings, etc).
Tested DIY Flour Blend You Can Use Instead
- Whisk together 1⅓ cup tapioca starch (160g); 1 ¼ cup millet flour (150g) OR 1 cup + 1 tbsp white rice flour (150g); 6 tbsp buckwheat flour OR ½ cup sorghum flour (60g)
Make Ahead/Proof Overnight
- Prepare the dough through step 4. Brush the inside of a large bowl with bit of olive and add the dough.
- Cover with plastic wrap then set aside at room temp for an hour or two to rise then transfer to refrigerator to proof overnight or up to 48 hours.
- When ready, take the dough out of the fridge and let sit at room temperature for 30-60 minutes. Continue from step 6.
Freeze For Later:
- After the pizza dough rises you can freeze one or both balls of dough to make pizza at a later time. Lightly coat all sides of the dough ball with olive oil.
- Wrap up in plastic wrap then place in freeze-safe zipped-lock bags. Freeze up to 3 months.
- To thaw, place the frozen dough in the fridge for about 8 hours or overnight.
- When ready to make pizza, remove the dough from the refrigerator and allow to rest for 30-60 minutes at room temperature. Preheat the oven and continue with step 5 (skip step 6).


Leave a Review!