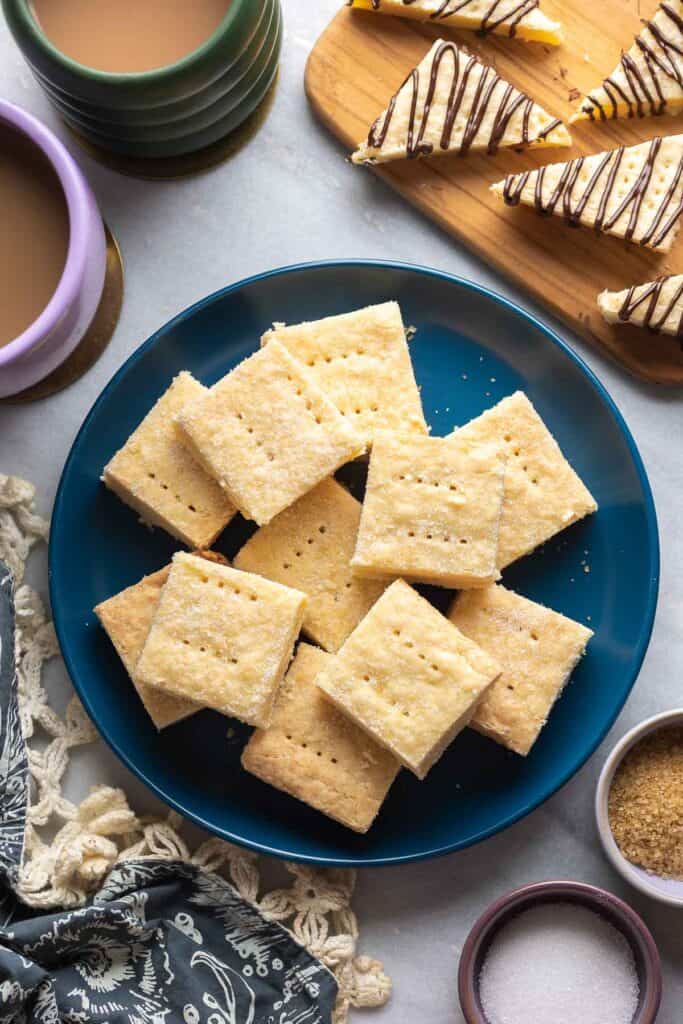
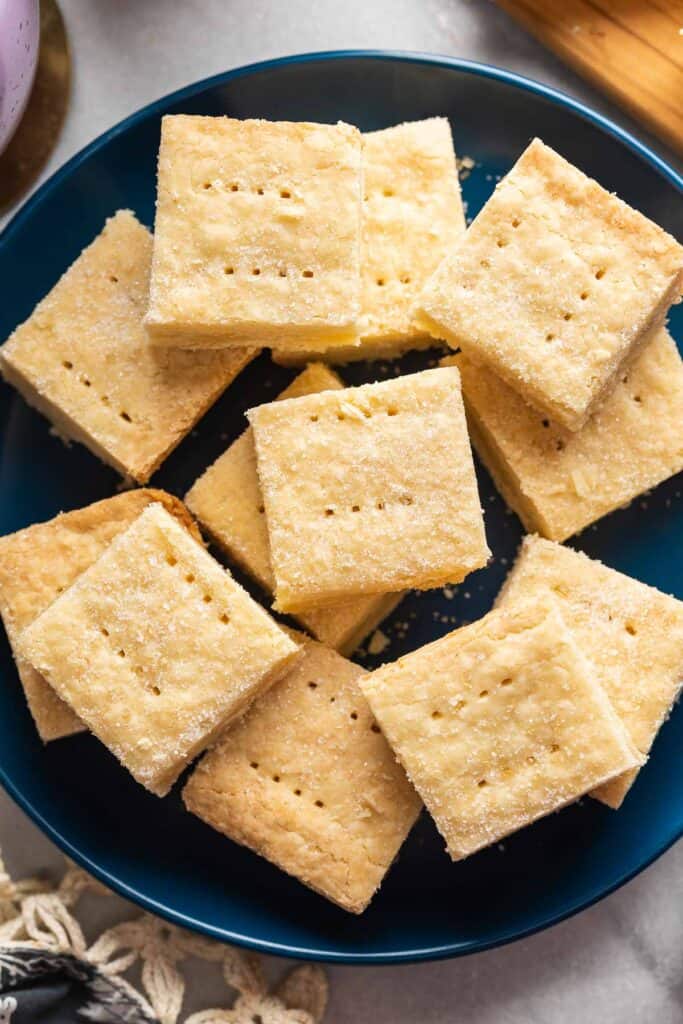
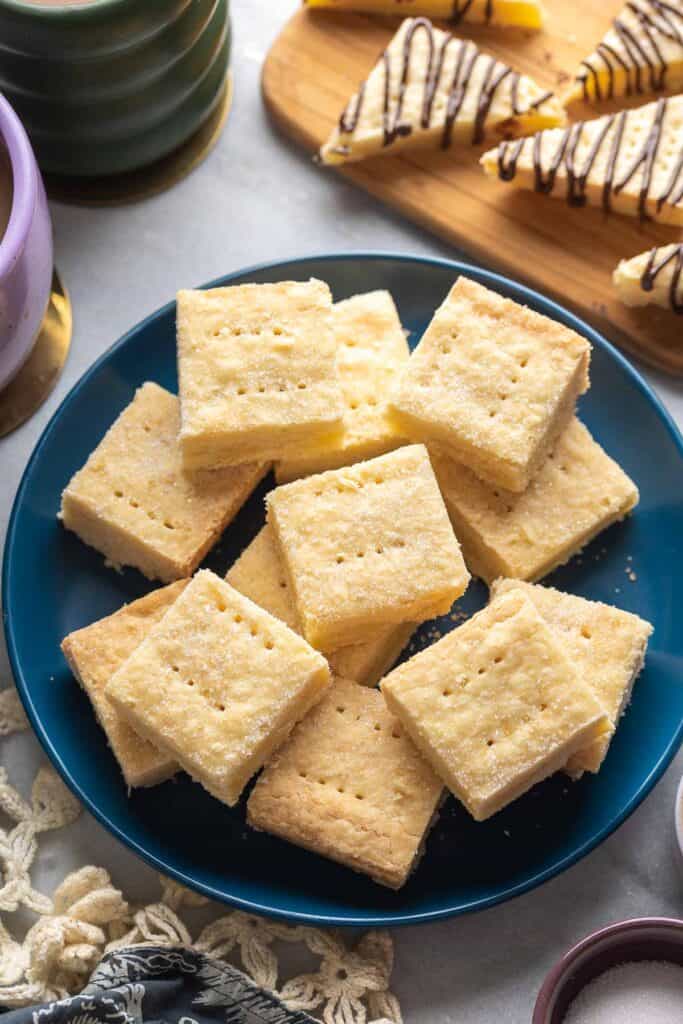
Sweet, simple and super buttery! Add this gluten free shortbread recipe to your must-make cookie list and enjoy! These secret to success? Make sure to use high-quality butter for the rich and creamy flavor.
⭐What’s Great about this recipe⭐
- 3:2:1 Ratio: Overall this is a super simple recipe that follows the 3:2:1 ratio principle for making shortbread with a few small tweaks to make it gluten free.
- Bake in a Pan: Save yourself the extra faff of chilling, shaping and slicing the shortbread by baking in a pan. After baking and cooling, slice up, serve and enjoy!
- Easy to Dress Up: Add chocolate, nuts, zest or more – there are so many different ways to add flavour depending on your mood or occasion.
How to Bake Gluten Free Shortbread
Traditional Scottish shortbread adheres to the classic 3:2:1 ratio for creating a basic cookie dough:
- 3 parts flour: 2 parts butter: 1 part sugar
What does that look like in this recipe?
First, take note that we measure by weight, not volume.
- 3 parts flour: 2 1/3 flour cup + 2 tbsp cornstarch = 350 grams
- 2 parts butter: 1 cup butter = 227 grams
- 1 part sugar: 1/2 cup + 2 tbsp sugar = 125 grams
Why measure by ratio?
Baking is all about the balance between ingredients.
How much fat, protein, and sugar do you need to end up with your desired result?
If you can understand the underlying ratio of ingredients needed to make something, you can then start to play around with the recipe itself to make something totally new.
BTW: If you’re interested in learning more about how to bake by ratio, I highly recommend Ratio: The Simple Codes Behind the Craft of Everyday Cooking by Michael Ruhlman.
Ingredients
All you need are a few simple ingredients:
- Butter: I prefer salted butter but you can absolutely use unsalted butter if you prefer. If you do use unsalted butter, make sure to add 1/2 tsp salt when you add the flour.
- Sugar: Use white granulated sugar or caster sugar. It’s technically the more authentic choice if you’re aiming for a Scottish style shortbread and it’s easier to work with since you don’t need to worry about sifting it first.
- Gluten-Free Flour: Use a basic, gluten free all purpose flour blend. I used the Gluten Free Plain White Flour from Freee, but you can use your favorite basic flour blend here.
- Xanthan Gum: Even if your flour blend already has a little bit of xanthan gum, I do recommend adding more to the recipe for the additional binding.
- Cornstarch: The idea here is to essentially make a very basic DIY cake flour by adding a small amount of corn starch. The goal is to lighten up shortbread, soften the texture and provide a bit more structure.
- Vanilla Extract: You can actually leave out the vanilla extract. Traditional recipes don’t bother with the added vanilla, but I think it adds a lovely flavor.
Flavor Variations
- Chocolate: Add 1/3 cup (60 g) mini chocolate chips or chopped chocolate to the gluten-free shortbread dough. Alternatively, drizzle a bit of melted chocolate over the top of your cooled shortbread.
- Nuts: Toast 1/2 cup (60 g) chopped nuts then stir into the shortbread cookie dough along with the other dry ingredients.
- Zest: Stir in 1 tbsp fresh lemon zest or orange zest to bright up the flavor.
- Spice: Add 1 tsp ground spice. Try cinnamon, apple pie spice, gingerbread, chai spice or pumpkin spice!
- Instead of mixing spice into the dough, mix with caster sugar and sprinkle over the top of the cookies to finish.
Recipe Tips
- Weigh the ingredients if possible: Invest in a reliable kitchen scale – it will make your life gluten-free baking SO much easier and more accurate.
- Don’t forget to prick the dough before baking: Just as you need to do when baking a pie crust, it’s important to poke holes across the dough. By giving the steam somewhere to vent, you’ll prevent the shortbread from bubbling up in the middle too much.
- Use a quality butter: If you’re in the US, look for grade AA butter or butter with minimal ingredients (avoid added ‘natural flavors’ and preservatives). European butter is usually +82% fat while American butter is usually around 80% fat. You really need a good butter here to really emphasise the delicious buttery taste!
More Gluten Free Cookie Recipes
Looking for another gluten free Christmas cookie recipe to try out for all our cookie exchanges this year?
- Gluten Free Gingerbread Cookies
- Gluten Free Sugar Cookies
- Vanilla & Almond Mushroom Cookies
- Gluten Free Red Velvet Cookies
- Chocolate Chip Cranberry Oatmeal Cookies
- Gluten-Free Peanut Butter Cookies
- Vanilla & Almond Mushroom Cookies
- Rosemary Lemon Christmas Tree Cookies
Enjoy!
Let me know if you try this gluten-free shortbread cookie recipe! Leave a comment and review with your thoughts. I always appreciate the feedback and serving suggestions that you come up with!

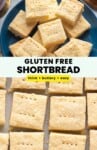
Gluten Free Shortbread Cookies
Sweet, simple and super buttery! The secret to success? Make sure to use high-quality butter!
Ingredients
- 1 cup room-temperature butter, salted or unsalted (227g)
- 1/2 cup + 2 tbsp white sugar (125g)
- 1 tsp vanilla extract
- 2 1/3 cup gluten free all purpose flour blend (330g)
- 2 tbsp cornstarch or potato starch (16g)
- 1/2 tsp xanthan gum
- *more white sugar to sprinkle on top after baking
Instructions
- Preheat oven to 375°F (190°C) and line an 8x8 inch baking pan (or similar sized pan) with parchment paper. Set aside.
- In a medium mixing bowl whisk together the flour, starch and xanthan gum until combined. Set aside.
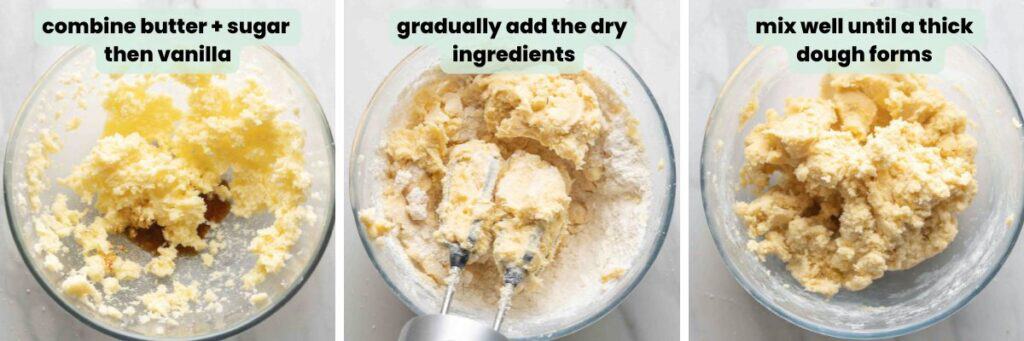
- Add butter and sugar to a large mixing bowl or to the bowl of a stand mixer. Mix with an electric mixer/stand mixer on a medium-high speed until well combined.
- Add the vanilla extract and mix until just combined. Make sure to scrape down the sides of the bowl as needed.
- Switch to a low speed and gradually add the flour mixture until just combined. The dough might look a bit dry and crumbly, but if you clump it together it should stick.
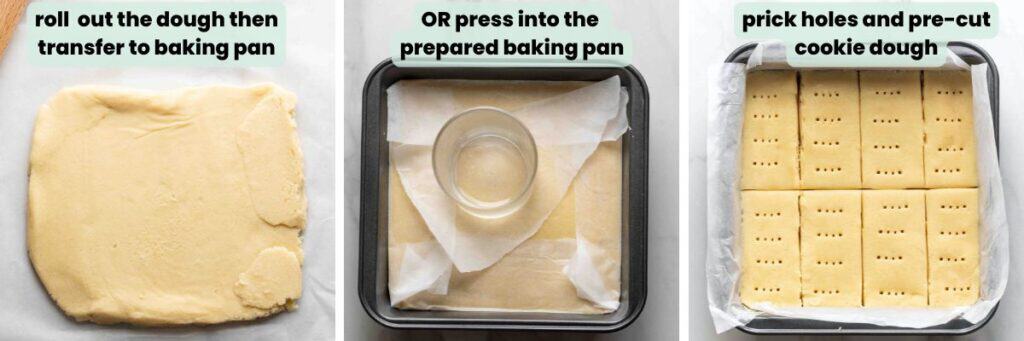
- Transfer the cookie dough to your prepared pan. Press the dough into the pan until it's spread in an even layer OR roll the dough out in between two pieces of parchment paper (don't flour the paper) then place in the pan. Press evenly across the bottom and sides of the pan. Use a fork to poke holes across the top of the shortbread to let steam escape as it bakes.
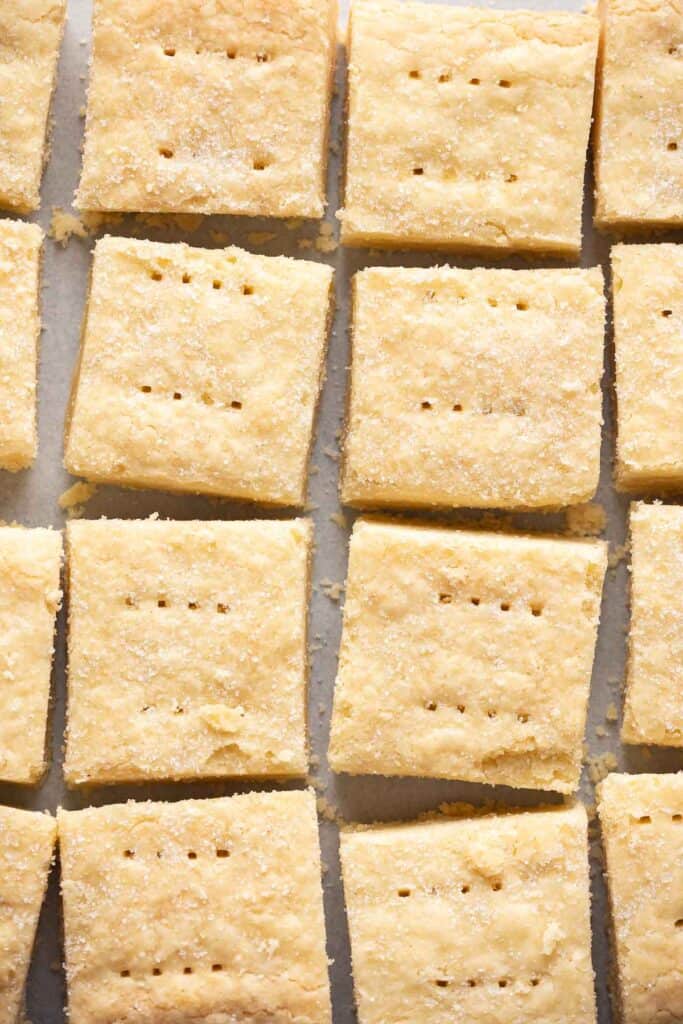
- Place the pan in the oven. Bake cookies for about 18-20 minutes or until the edges are starting to lightly golden. Remove and sprinkle with sugar while it's still hot.
- Leave in the pan to cool completely before removing and slicing. Give them an hour before you slice in to them - if you cut them too soon they're more likely to crumble. After an hour or two they'll be fine to slice, plate or pack up without worry.
- Store cookies in an airtight container at room temperature for a week.
Notes
- Butter: If you're in the US, look for grade AA butter or butter with minimal ingredients (avoid added 'natural flavors' and preservatives). European butter is usually +82% fat while American butter is usually around 80% fat.
- Dairy Free/ Vegan: Use a good, vegan butter block - not a spreadable butter from a tub. I recommend Stork vegan baking block or Flora plant based butter block.
- If you want to use unsalted butter make sure to add 1/2 tsp fine grain salt.
- Make sure to leave a bit of the paper hanging over the sides so you can easily lift the shortbread out later. If you're using a loose-bottom pan, no need to line - just grease the pan.
- Making these cookies in hot weather/ hot kitchen? Chill the dough about 30 minutes before baking to firm up the butter.
- It's very likely the lines/holes you've poked into the dough will mostly disappear during and after baking - that's ok! Though the dough mostly melts into itself, you should still have very faint lines visible that make cutting the shortbread cleaner/easier. The fork holes will also mostly disappear, but you can go over them again after baking if you want visual.


Patricia says
I love traditional shortbread, I have a friend who eats only gluten free, so I have made tour recipe 3 times now, problem is it is soft and bubbling on top and all evidence of cut pieces and forking had completely disappeared. Currently waiting for it to calm down to see if it might be rescued. I am an experienced home cook with a light touch, my old fashioned none GF is always quick, easy and delicious. Please help x
Sarah Nevins says
Hi Patricia! A little bit of bubbling is expected and totally fine while baking – you can kind of see some faint air bubbles in my pics. They looked a lot more intense in the oven, but settled down after cooling.
If there was too much bubbling, there could have been a few things going on. I’ll list out a few different possibilities – some (or none) of them may be relevant to what you did, but I’ll include them just in case.
-The dough was over mixed/mixed on too high of a speed. The longer/faster you mix the dough, the more air will incorporate into the dough. The incorporated air expands and is what bubbles up in the oven. That’s why it’s recommended to mix the flour into the butter + sugar mixture until just combined.
-It’s possible the dough was too warm before baking. This can easily be a problem in warm kitchens/hot weather. The butter should be soft, but not too melty before mixing. Individual oven temp can also factor in and be a tricky thing to account for. Most ovens run hotter or colder than what they’re supposed to. If your oven runs hot, that could mean that the butter melted too fast in relation to everything else.
-Butter fat percentage: Not all butter is made equally – some have higher butterfat ratios (ideal) than others. For example, European butter has 82%-90% butterfat while the USDA requires only 80% butterfat. The less fat in your butter, the more water you get which will create more steam/bubbling in your shortbread.
-Measured amounts not fully accurate if you used measuring cups instead of a kitchen scale. If you’re used to baking with regular all-purpose flour (non gluten free) then you might not be as familiar with how much fussier gluten free baking can be. Measuring cups are a great tool for getting you close to the target weight, but aren’t always 100% accurate. If you scooped or packed the flour into your measuring cup, you can easily end up with an extra 20+ grams of flour. If you spooned the flour in too lightly, you could end up with too little flour which would throw off the balance of everything else. This is less of an issue when you’re baking with gluten, but really stands out as a problem for GF baking.
-The last thing I want to point out (and this is something I should have made clear in the recipe, but I’ve added now!), it’s very likely the lines/holes you’ve poked into the dough will mostly disappear during and after baking – that’s ok! Though the dough mostly melts into itself, you should still have very faint lines visible that make cutting the shortbread cleaner/easier. When testing the recipe, I baked some shortbread without making the lines and found it slightly trickier/messier to cut the bread after baking without the very faint lines to follow. The fork holes will also mostly disappear, but you can go over them again after baking if you want visual. Again, I should have made that clear in the recipe so apologies if that added some extra confusion!
I hope this response is helpful! If you don’t feel like any of these things related to your issue please come back and let me know so we can figure it out! Also – I think it’s really great that you’re trying to make shortbread for your friend 🙂