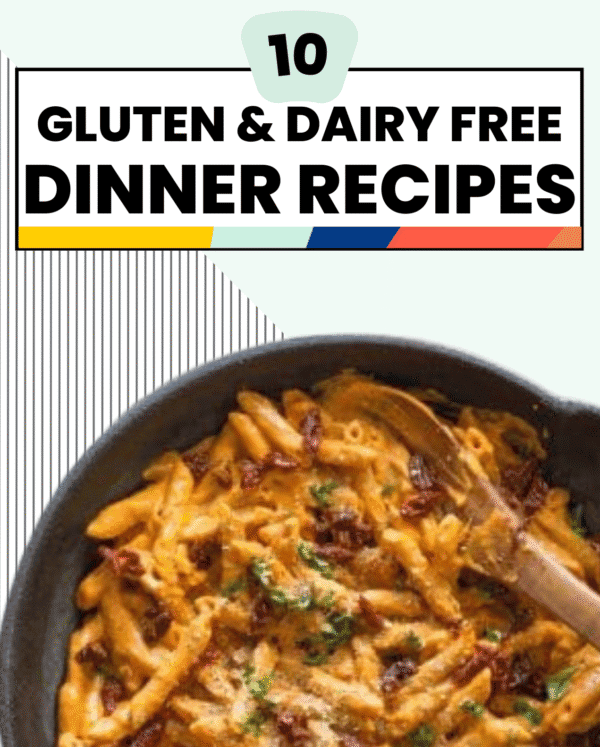
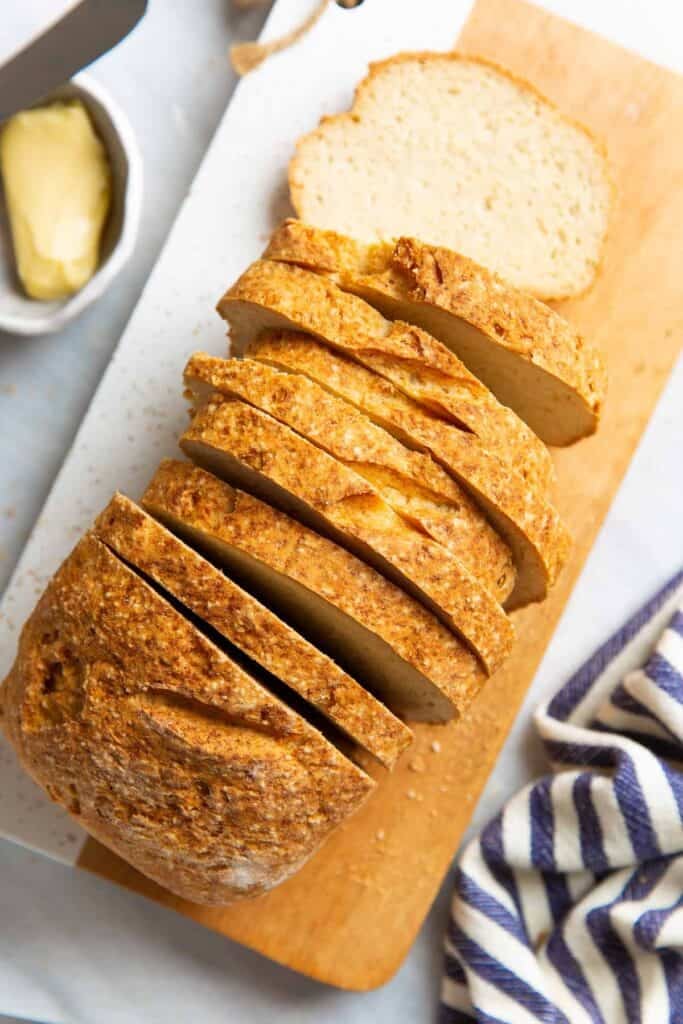
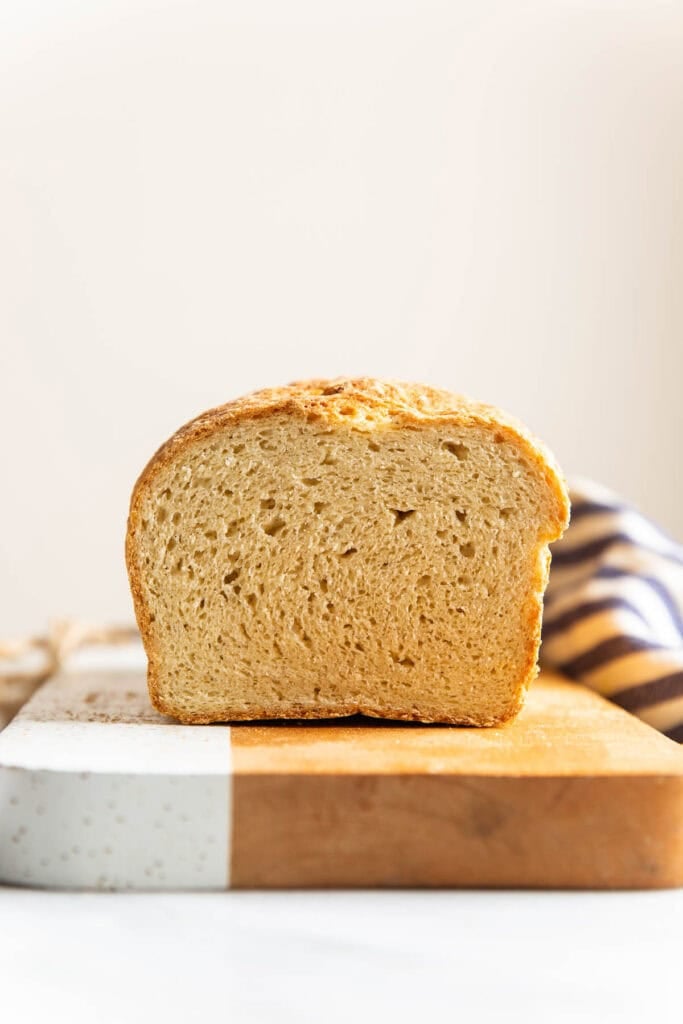
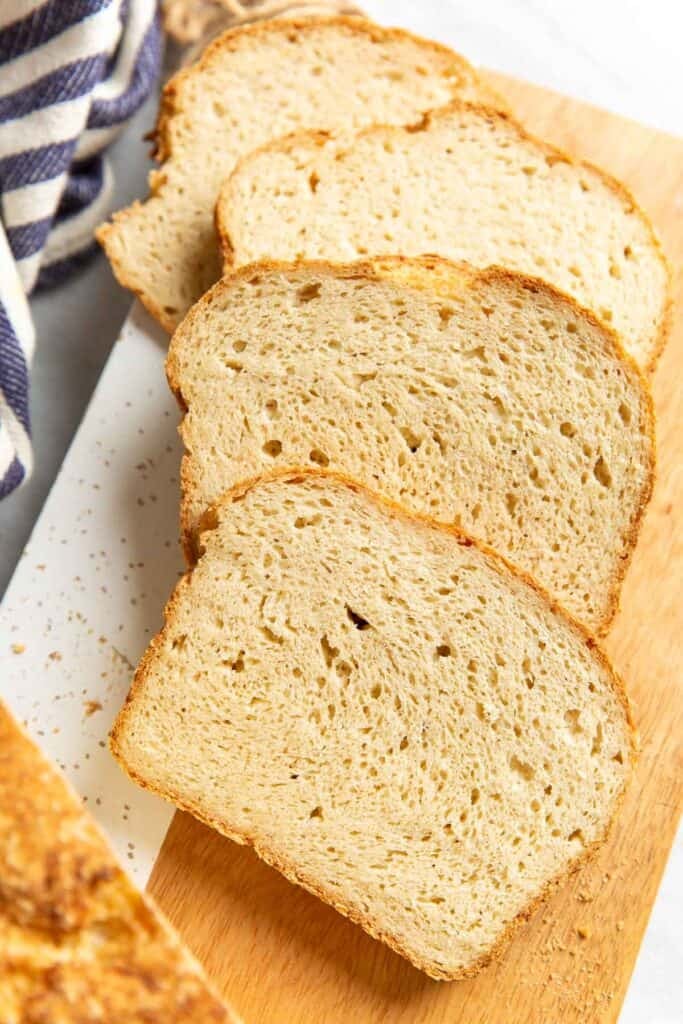
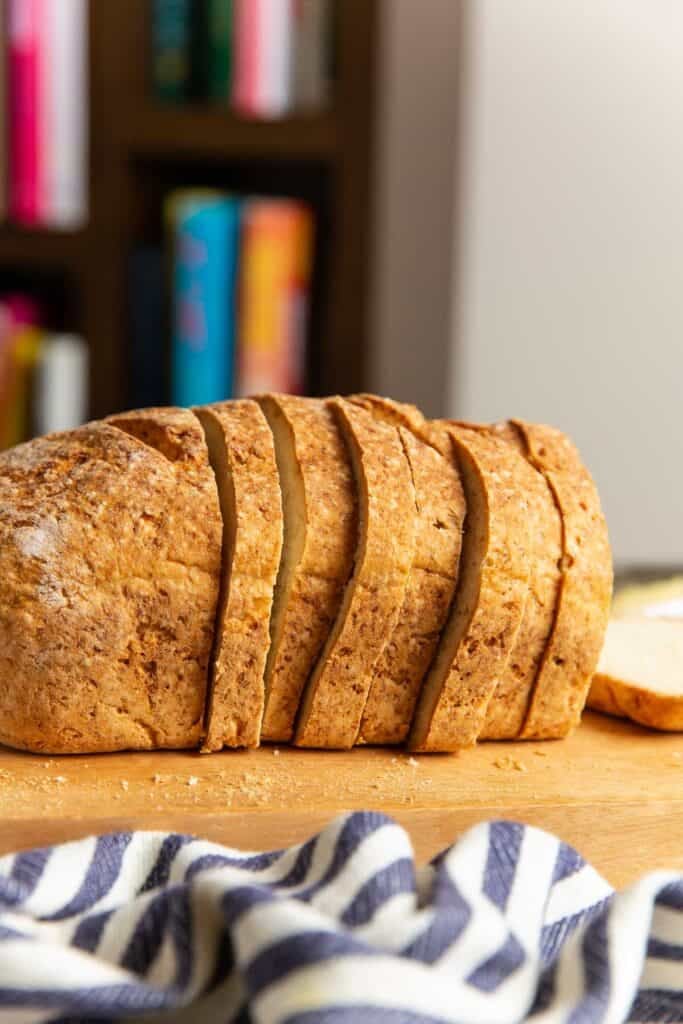
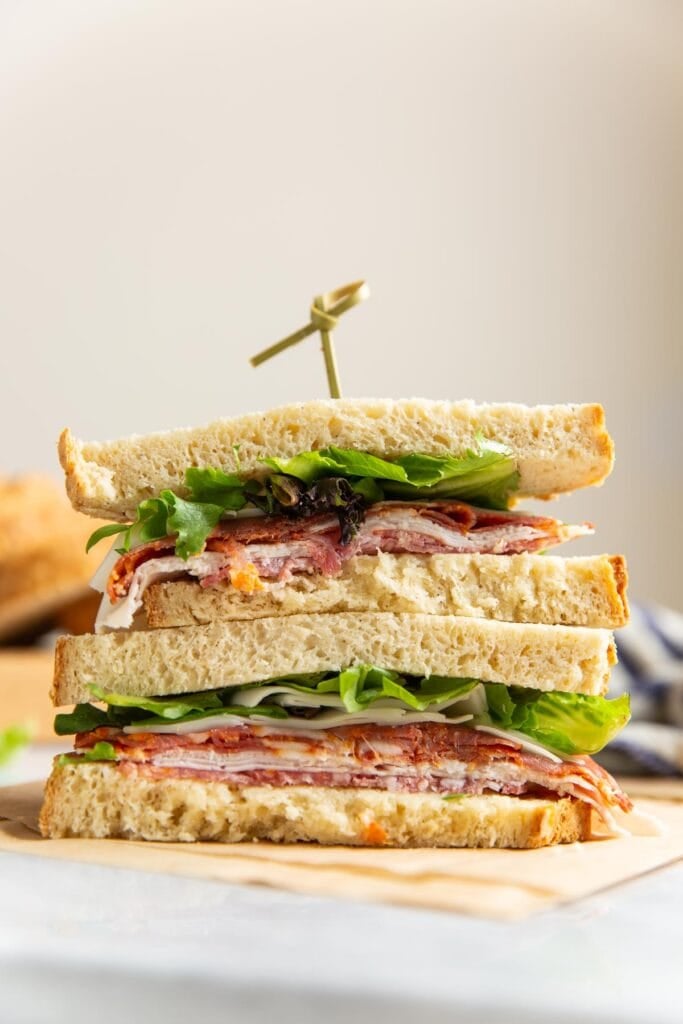
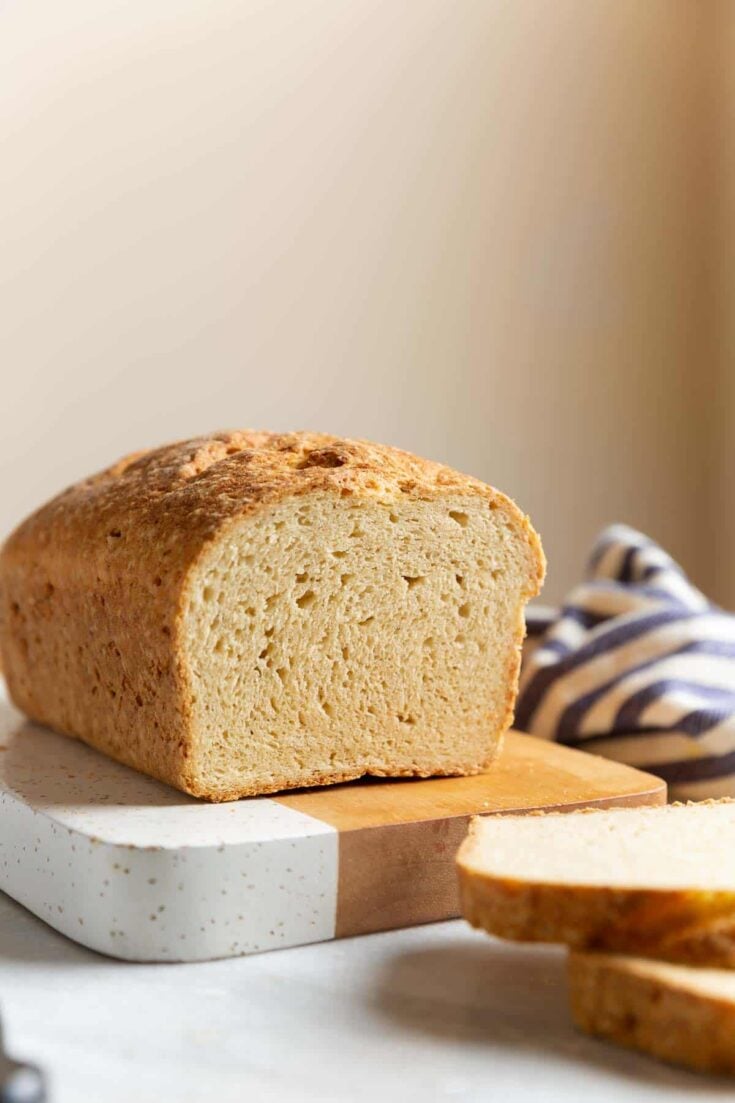
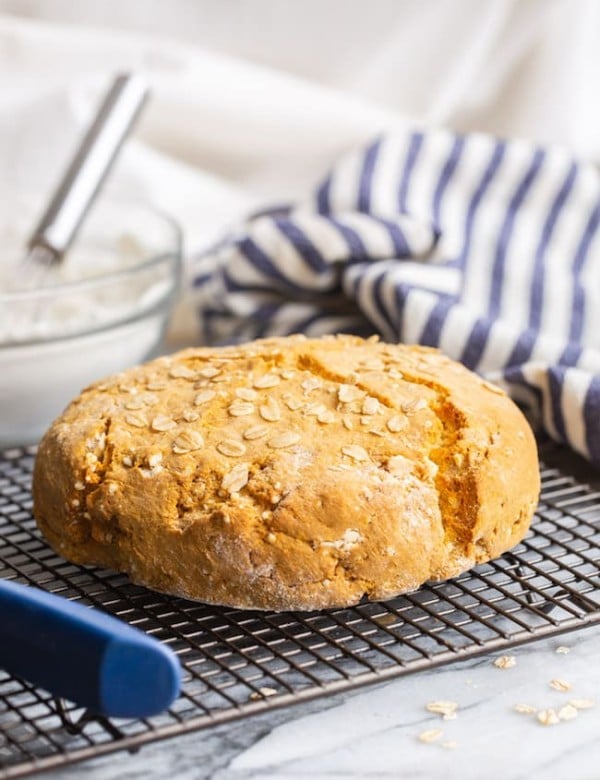
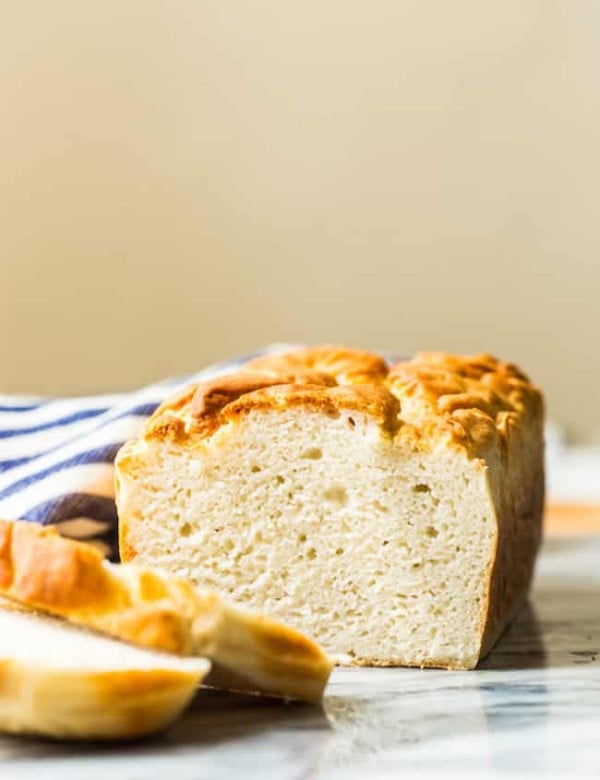
This homemade gluten free sandwich bread is soft and tender on the inside with with a crisp, golden crust on the outside. It has a pleasant, mild flavor that compliments both sweet and savory sandwich fillings. Slice it up for sandwiches, toast or your favorite spreads!

A Few Highlights to Note About this Gluten Free Sandwich Bread Recipe
- The dough is soft and kneadable like a wheat-based bread dough.
- Gluten free dough usually feels more like thick cake batter than dough because of the missing gluten. This recipe uses both psyllium husk and xanthan gum to add structure and flexibility so you can knead and shape like regular bread.
- It’s soft, but sturdy.
- Gluten free bread can often be dry and crumbly. This recipe is made with an enriched dough (not too different from my gluten free soft dinner rolls). Enriched doughs include high fat & moisture ingredients like eggs, milk and butter to create a soft, tender bread.
- It has a mild, neutral flavor.
- The final loaf is not too sweet, savory or strongly flavored which means that it works well with both sweet and savory sandwich fillings.
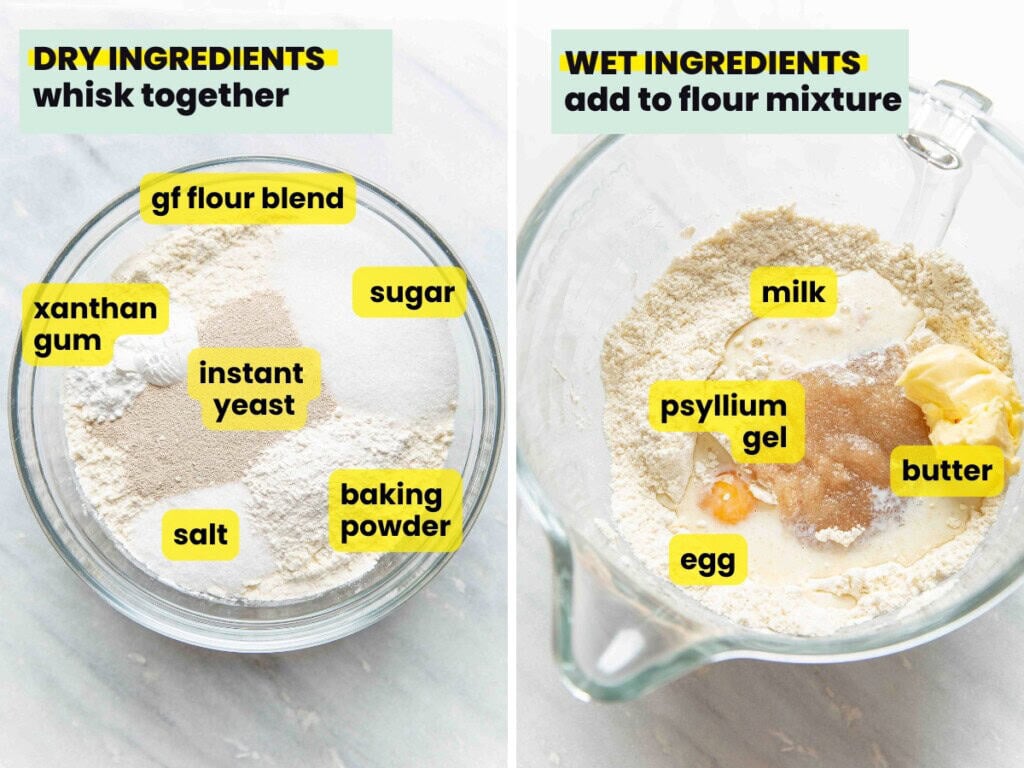
Ingredients You’ll Need
- gluten free flour blend
- psyllium husk – binding & structure
- xanthan gum – binding & flexibility
- instant yeast – lift & flavor
- baking powder – extra lift
- salt & sugar – flavor
- milk – fat & hydration
- butter – fat & flavor
- egg – fat, structure & and a bit of lift
- water – hydration
Why Use Both Psyllium Husk AND Xanthan Gum?
✓Psyllium husk adds binding & structure.
✓Xanthan gum adds binding & flexibility.
Use both in this recipe to make a bread that has a strong & sturdy structure, but is still soft & squishy on the inside.
As a general rule of thumb, you want to use psyllium husk when baking bread and xanthan gum when making cookies, cakes and quick breads and both ingredients together when making enriched doughs.
Make the Dough
The recipe might look complicated at first glance, but it’s actually quite simple.
- Whisk the dry ingredients together in a large bowl.
- Add the wet ingredients to the flour mixture.
- Mix together for a few minutes (ideally in a stand mixer) until well combined.
↓↓ Tip for making this without a stand mixer.
Mix the wet ingredients together in a bowl before adding them to the flour mixture. Use a rubber spatula to mix start mixing the dough, then use your hands when it gets hard to stir. Mix and knead the dough for 5-10 minutes until very well combined.
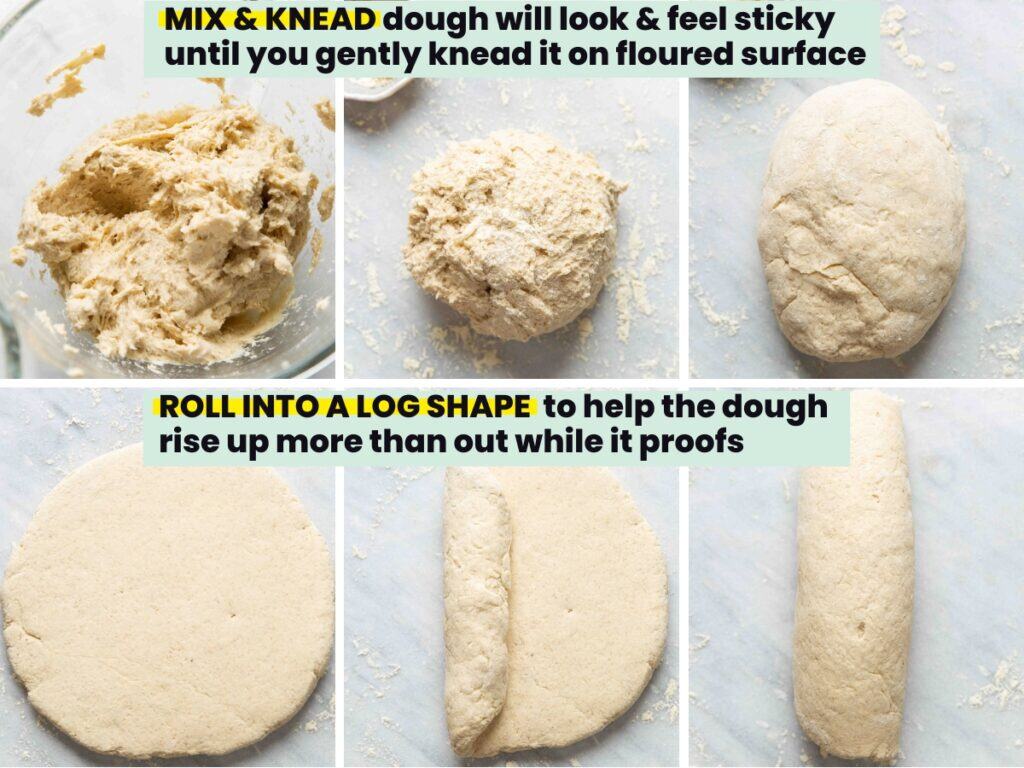
Knead & Shape
The dough will look and feel sticky just after mixing, but it should easily clump together and de-stick from the sides of your mixing bowl with the help of a rubber spatula.
- Smooth dough: Plop the dough down in the middle of a well-floured work surface. Dust a bit of flour on your hands and smooth the flour over the outside of the dough until smooth. Gently knead and shape the dough into ball or oval.
- Flatten dough: Press the dough with your hands or roll with a rolling pin into an 8×5 inch rectangular shape.
- Doesn’t need to be a perfect rectangle or size. You just want it to about 8-inches long/wide at most so it will fit inside the loaf pan.
- Roll into a log: Start from the short side and roll the dough into a log shape. Tuck the ends down then place inside the loaf pan.
- Loaf pan does not need to be greased.
- Roll into a tight log so you don’t end up with a big hole in the middle of the bread after baking.
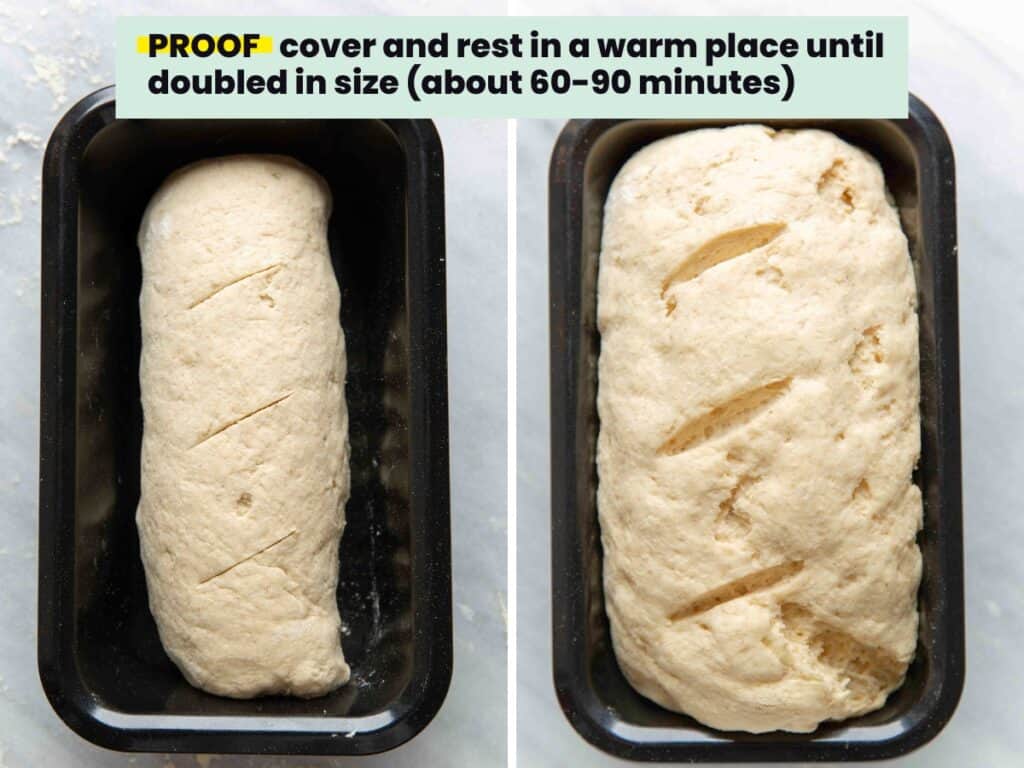
Proof the Dough in a Warm Place until nearly doubled then Bake
Loosely cover the loaf pan with foil, plastic wrap or a clean kitchen towel then leave the dough somewhere warm to rest and rise until you’re ready to bake.
A couple tips for proofing:
- Score the dough in a few places before rising so the dough expands in a more controlled way.
- Don’t cover the dough too tightly so it can easily rise up without hinderance.
- If your kitchen is cold or drafty, proof in a mildly warm oven. Preheat on the lowest setting for about 5 minutes or so while you’re kneading the dough. Just make sure to turn it off before you add the bread!
Recipe Questions
How do I make dairy free sandwich bread?
Use dairy free milk and vegan baking butter (one that comes in a stick or block, not the spreadable kind in a tub) to make the dough. Use vegan butter and cream cheese for the frosting.
Egg Free Option: Add an extra 2 tbsp milk (30ml) and 1 tbsp butter (14g).
How do I make it egg free?
Add an extra 2 tbsp milk (30ml) and 1 tbsp butter (14g).
The final bread won’t be as tall and will be a bit more dense, but overall, it’s still great!
You may also be interested in checking out my Gluten Free Vegan French Bread which uses aquafaba in place of eggs.
What flour should I use?
I tested this recipe with a few different gluten-free flour combos so you’d have some options to choose from.
No matter what flour you use, I highly recommend you use a kitchen scale to weigh out all ingredients.
#1: Use 410g of basic all purpose gluten free flour blend or gluten free bread flour blend. I highly recommend you use a kitchen scale for best results, but if you can’t, use 3 cups flour and be careful to add as little flour as possible when kneading the dough later.
#2: Rice flour & tapioca starch: 1 ½ cup white rice flour (210g) + 1 ⅔ cup tapioca flour (200g)
#3: Millet flour, sorghum flour & tapioca flour: 1 ¼ cup millet flour (150g) + ½ cup sorghum flour (60g) + 1 ⅔ cup tapioca flour (200g)
The general idea when it comes to mixing your own gluten free flour blend here is to use about 50% starch (tapioca) and 50% protein flours (millet, sorghum & rice).
With this in mind, you can make this bread using a huge variety of different flours with varying degrees of success. Keep in mind that different flours contain different amounts of fat, protein & starch which will impact that final taste, texture and bread structure.
If you have any particular flours you’d like to use, please leave a comment below to ask!
Can I make this without psyllium husk?
No – this recipe was specifically made with psyllium husk in mind. Without it, you would need to change too many ingredients and ingredient quantities to make it work.
If you don’t want to use psyllium husk, check out my easy gluten–free bread recipe instead (which is also dairy free!). This recipe uses xanthan gum only. The dough is more batter like, but at the time I’m writing this, the recipe has 4.6 stars out of 116 ratings.
Why preheat the oven on a super hot setting then bake at a lower temperature?
The idea is to expose the dough to an initial blast of heat with the goal of giving your bread an extra boost of springiness as it bakes. The high heat causes the trapped gases in the dough to expand quickly before the crust sets which should create a taller, lighter loaf.
Freeze the Dough to Bake On a Later Date
- Make, roll & shape the dough as normal then wrap up tightly in plastic wrap.
- Place the wrapped up dough inside a 9×5-inch loaf pan. Cover the pan with foil and freeze for about 3-4 hours or until solid.
- Take the frozen dough log out of the pan then transfer to a large freezer safe bag or wrapped up in another layer of foil to keep it safe from freezer burn.
- Label the bag or foil with the name & date and freeze up to 3 months.
- When you’re ready to prep & bake: Unwrap the dough and place it back inside the loaf pan. Defrost dough at room temp for a few hours or in the fridge overnight. Once fully thawed, cover and set aside in a warm environment to let the bread rise, then bake as usual.
The basic idea is to freeze the dough in the right shape & size so you can thaw and proof the dough right in the baking pan later when you’re ready.
What else can you make with your homemade gluten free sandwich bread besides making sandwiches?
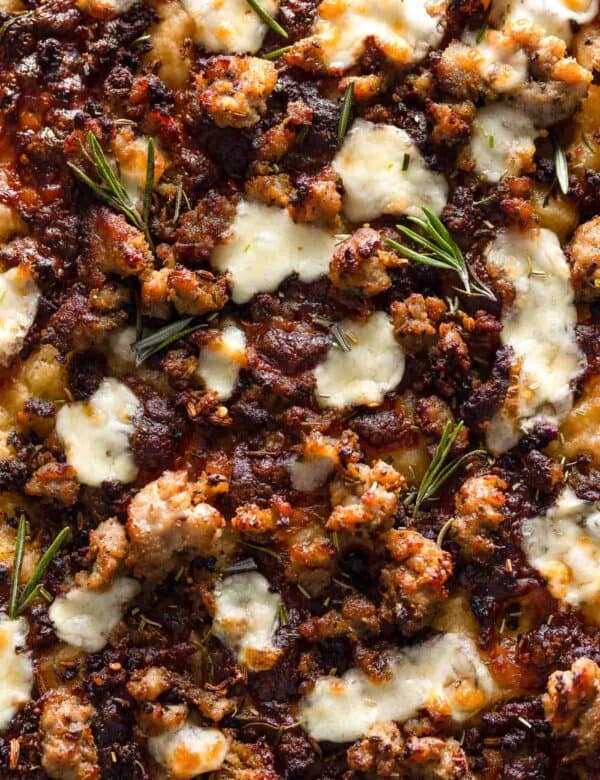
- French Toast: This bread is perfect for making French toast – especially once it starts to go a bit stale.
- Fancy Toast: Try it with this Cilantro Lime Pesto Toast & Tomato Salsa or this Honey & Thyme Ricotta with Fig Toast
- Croutons: Toast on the stove top or bake until crispy. You can season the croutons as you like and add them to soups & salads for a little extra crunch. This also works great in homemade stuffing.
- Breadcrumbs: Toast and grind up leftover slices to make your own gluten free crumbs to use in meatballs, fritters, chicken tenders and more.
More Gluten Free Bread Recipes to Check Out
Enjoy!
Let me know if you try this Gluten Free Sandwich Bread recipe! Leave a comment and review with your thoughts. I always appreciate the feedback and serving suggestions that you come up with!
Gluten Free Sandwich Bread Recipe
Psyllium and xanthan gum combine to create a dough that's soft & kneadable like regular wheat bread and bakes into a soft loaf with a crisp, golden crust.
Ingredients
- ¼ cup whole psyllium husk (20g)
- 1 cup water - warm or room temp (240ml)
- 3 cups gluten free all purpose flour blend (420g)
- 2 tbsp sugar (25g)
- 2 ¼ tsp instant yeast (8g) - also called yeast or rapid-rise yeast
- 2 tsp baking powder (8g)
- 1 ¾ tsp xanthan gum
- 1 ½ tsp salt
- ½ warm whole milk (120ml)
- 3 tbsp salted or unsalted butter, softened (42g)
- 2 eggs, room temperature
Instructions
Dough
- Psyllium Gel: In a medium bowl, whisk psyllium husk and water together until no lumps remain. Set aside.
- Whisk dry ingredients. In a stand mixer bowl, whisk flour, sugar, yeast, baking powder, xanthan gum and salt.
- Add wet ingredients. Add the psyllium gel, milk, butter and eggs to the flour mixture.
- Mix into a dough. Mix on a medium speed with a dough hook or paddle attachment. Stop and scrape down the sides of the bowl to make sure no flour pockets remain. Continue mixing for about 5 minutes to ensure it's evenly mixed. The dough will look sticky and wet, but should easily clump together when you scrape down the sides with a rubber spatula.
- Knead & shape. Add the dough to a floured surface and gently knead with floured hands until the the dough is soft. Shape into a ball, then use a rolling pin to roll the dough out into an 8x5 inch rectangle. Roll the dough tightly into an 8-inch log then place inside a 9x5-inch (23x13cm) loaf pan.
- Score the dough. Use a sharp knife or kitchen scissors to make shallow cuts over the surface of the dough. This will help you control the direction of how the dough expands as it rises and is an opportunity to add decorative patterns to your bread.
Proof & Bake
- Proof. Cover with plastic wrap, foil or a clean kitchen towel and set aside in a warm, place to let the dough rise for about 1-1½ hour or until the dough has doubled in size.
- Preheat & bake. Preheat your oven on the hottest setting. Let it preheat for at least 15 minutes to ensure it's really hot. When you're ready to bake, place the loaf pan on the lowest oven rack and reduce the temperature to 400°F (200°C). Bake for 45-55 minutes. The bread should have a golden-brown crust on top and sound hollow when you tap it. Internal temperature should be around 190°F (88°C) - 200°F (94°C). Check the oven after around 25 minutes - if the top crust is looking pretty golden brown already, cover with foil for the remaining bake time.
- Cool bread. Remove the bread from the loaf pan right away and place on a wire rack until completely cooled. Wait until it's cool to slice the bread so the starches have time to properly set otherwise they might feel a bit gummy.
- Slice & enjoy. When you're ready, slice only what you need to keep the inside nice and soft. Use within 3-4 days for sandwich bread. Past that time, use leftover bread to make french toast, croutons or breadcrumbs.
Notes
- For best results: Use a kitchen scale to weigh ingredients. Small weight variations can make a big difference!
- Milk/ Dairy Options: I recommend whole milk, but you can use semi-skimmed or even dairy free milk. Use softened vegan block butter in place of butter & dairy free milk to make the bread totally dairy free.
- Psyllium: Make sure to use whole psyllium husk, not psyllium husk powder. Powdered psyllium husk clumps quickly & easily when introduced to water which makes it harder to mix. If you only have powdered husk, reduce the amount to 1 tbsp + 1 tsp powdered husk OR just measure out 20g.
- No stand mixer: Mix wet ingredients together in a separate bowl first, then add them to the flour mixture. Use a rubber spatula to mix start mixing the dough, then use your hands when it gets hard to stir. Mix and knead the dough for 5-10 minutes until very well combined.
Flour Blends I Tested That You Can Use Instead
- DIY Flour Blend #1: Whisk together 1 ⅔ cup tapioca flour (200g), 1 ¼ cup millet flour (150g) & ½ cup sorghum flour (60g).
- DIY Flour Blend #2: 1 ½ cup white rice flour (210g) + 1 ⅔ cup tapioca flour (200g)


Polly says
Let me start by saying that I am NOT a baker. Desperation drove me to try this recipe. Unfortunately I cannot tolerate ANY grains so I used a Paleo flour mix that has almond, arrowroot, coconut and tapioca flours in it. This would almost assuredly mean the bread would be different but I was hopeful. It probably would have turned out fine had I known that baking powder goes flat, so to speak. Mine was probably 20+ years old, LOL !!!
I also found out mid recipee that I didn’t have any double acting yeast. I discovered this AFTER I had already put the water and psyllium husk together. By the time I returned from the store, it was a solid mass. Lessons learned though. It never rose but the taste is still very good. I am excited to try again … this time with new baking powder and all ingredients on hand. Thank you for your work making these recipes for those of us who need them.
Sarah Nevins says
Hi Polly – I’m glad the bread still tasted good even with all the changes! Not being able to tolerate grains is frustrating, but it sounds like you’re making it work! When it comes to making bread – are you more interested in a more classic yeasted sandwich bread or are yeast-free quick breads ok?
Whenever I’ve tried or come across grain-free yeasted breads in the past, the ones that usually come out the softest/least dense are the recipes that ones that are made with a lot of eggs or egg whites (6 or more) which are whipped up enough to create a light and somewhat airy texture. Yeast seams to struggle with the heavier grain-free flours. Baking powder works fairly well with grain free flours, but you do need a lot of it to get a rise and too much baking powder creates a bitter, metallic taste.
If you’re interested in trying other bread recipes, I quite like these paleo biscuits made with tapioca flour and coconut flour: https://www.asaucykitchen.com/paleo-biscuits/#mv-create-recipe You can leave out the dried herbs & garlic powder if you like. It’s not a loaf of bread, but my husband would cut them in half and use them as bread rolls when he was on a grain-free diet. The main downside with that recipe is that the it doesn’t make much. If you wanted to use them as bread rolls I recommend dividing the dough into 4 pieces instead of 6.
This Everything Bagel Almond Flour loaf is quite popular as a grain free bread, but it does have a lot added seeds that might not be your thing: https://www.asaucykitchen.com/almond-flour-bread/
If you wanted to make a plain version of this bread, you omit all the different the seeds and add 1/4 cup tapioca starch and 1/4 cup coconut flour (lightly packed) in place of the seeds.
I hope this helps!